

You installed Windows 11, logged in, and assumed you were protected. You’re probably not.
Microsoft ships Windows 11 with several critical security features turned off by default — including full-disk encryption, kernel-level protection, and ransomware shields. The system looks secure, but until you manually enable these settings, significant gaps remain.
This guide covers every Windows 11 security setting you must enable in 2026—with exact navigation paths, the reason each setting matters, and the real-world attack it prevents. No fluff, no fillers.

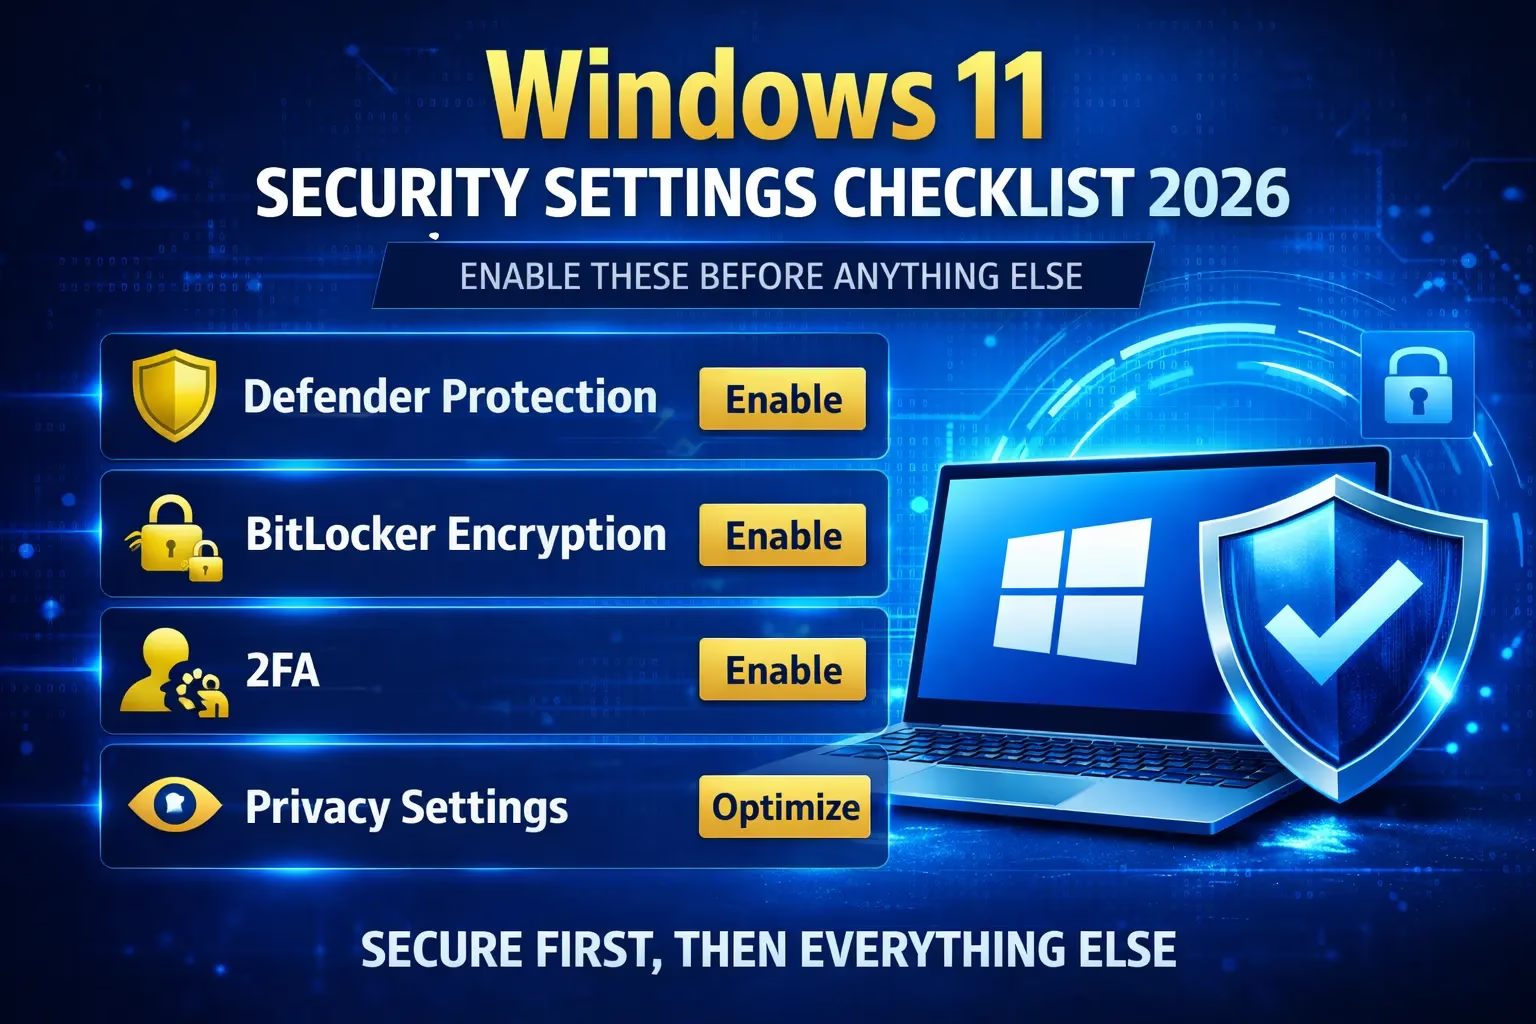
⚡ 1. Quick Wins: Do These First (Under 5 Minutes)
Before diving into the detailed settings, these three actions eliminate the most common entry points immediately:
- Set a strong login PIN or password — avoid anything with your name, birthday, or “1234”
- Enable Windows Hello (Face or Fingerprint) for fast, phishing-resistant login — go to Settings → Accounts → Sign-in options
- Disable automatic login — if someone restarts your PC, they should hit a password screen, not your desktop
Lock shortcut to remember: Win + L instantly locks your screen whenever you step away.
💡 Reality check: Most breaches — corporate and personal — begin with physical access or credential theft, not sophisticated exploits. These basics close that door.
🔄 2. Windows Update — The Non-Negotiable Foundation
Every month, Microsoft Patch Tuesday releases fixes for dozens of known vulnerabilities. Delaying these updates is the equivalent of knowing your lock is broken and choosing not to fix it.
Settings path:
Settings → Windows Update
Enable these specifically:
- Automatic updates — set to install automatically, not “notify only”
- Receive updates for other Microsoft products — covers Office, Edge, and Visual C++ runtimes
- Optional updates — includes driver updates that patch hardware-level vulnerabilities
- Active hours — configure so restarts don’t interrupt work, but updates aren’t indefinitely postponed
Check your current patch status: search “winver” in Start and compare your build against the latest release at Microsoft’s Windows 11 release page.
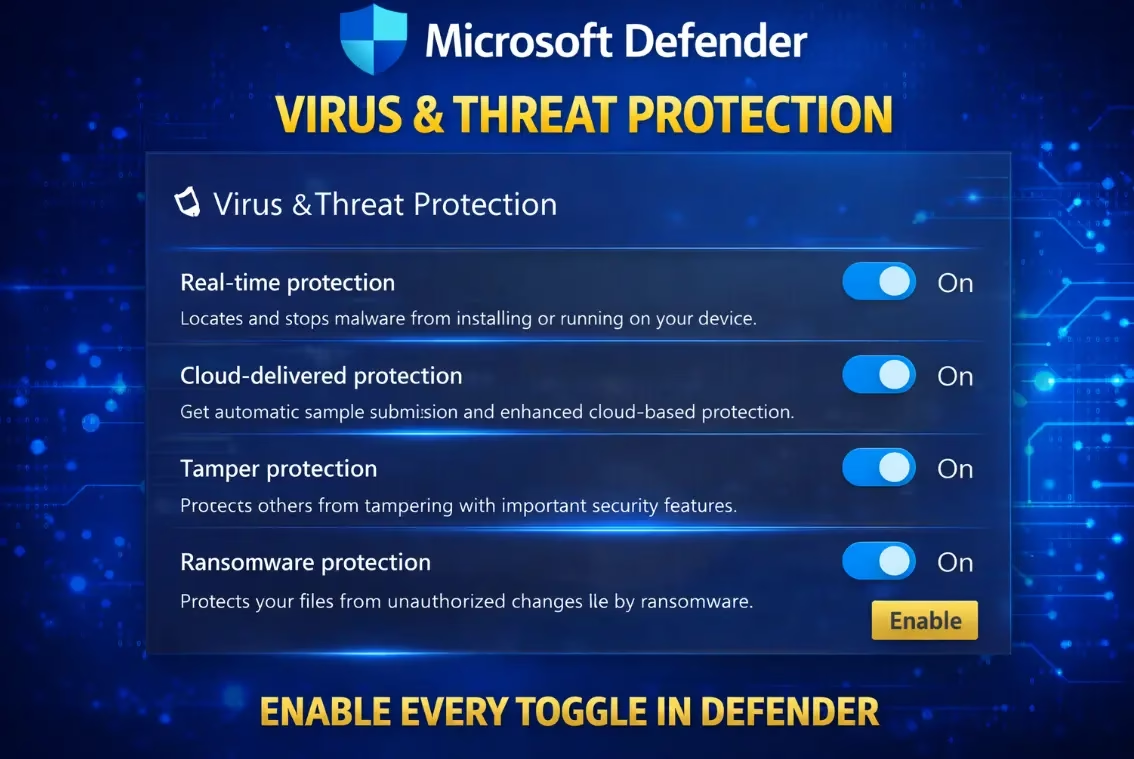
🛡️ 3. Microsoft Defender: Every Toggle That Actually Matters
Microsoft Defender in 2026 consistently scores 99%+ detection rates in independent lab tests (AV-TEST, AV-Comparatives). But several of its most powerful features are not enabled by default.
Settings path:
Windows Security → Virus & Threat Protection → Manage Settings
Must-enable toggles:
- ✅ Real-time protection — scans files as they are opened or downloaded
- ✅ Cloud-delivered protection — uses Microsoft’s threat intelligence for zero-day detection
- ✅ Automatic sample submission — improves cloud detection (safe to enable)
- ✅ Tamper protection — prevents malware from disabling Defender itself
Enable Ransomware Protection (Separate toggle):
Windows Security → Virus & Threat Protection → Ransomware Protection
- ✅ Controlled folder access — blocks unauthorized apps from modifying protected folders
- Add your Documents, Desktop, and Pictures folders manually if they aren’t already listed
⚠️ Common mistake: Many users disable Defender or add their entire C:\ drive as an exclusion to “improve performance.” This completely neutralizes protection for your most critical files.

🔐 4. BitLocker: Turn Laptop Theft Into a Dead End
Without disk encryption, a thief who removes your SSD and connects it to another PC can read every file on it — regardless of your Windows login password. BitLocker encrypts the entire drive so the data is unreadable without the recovery key.
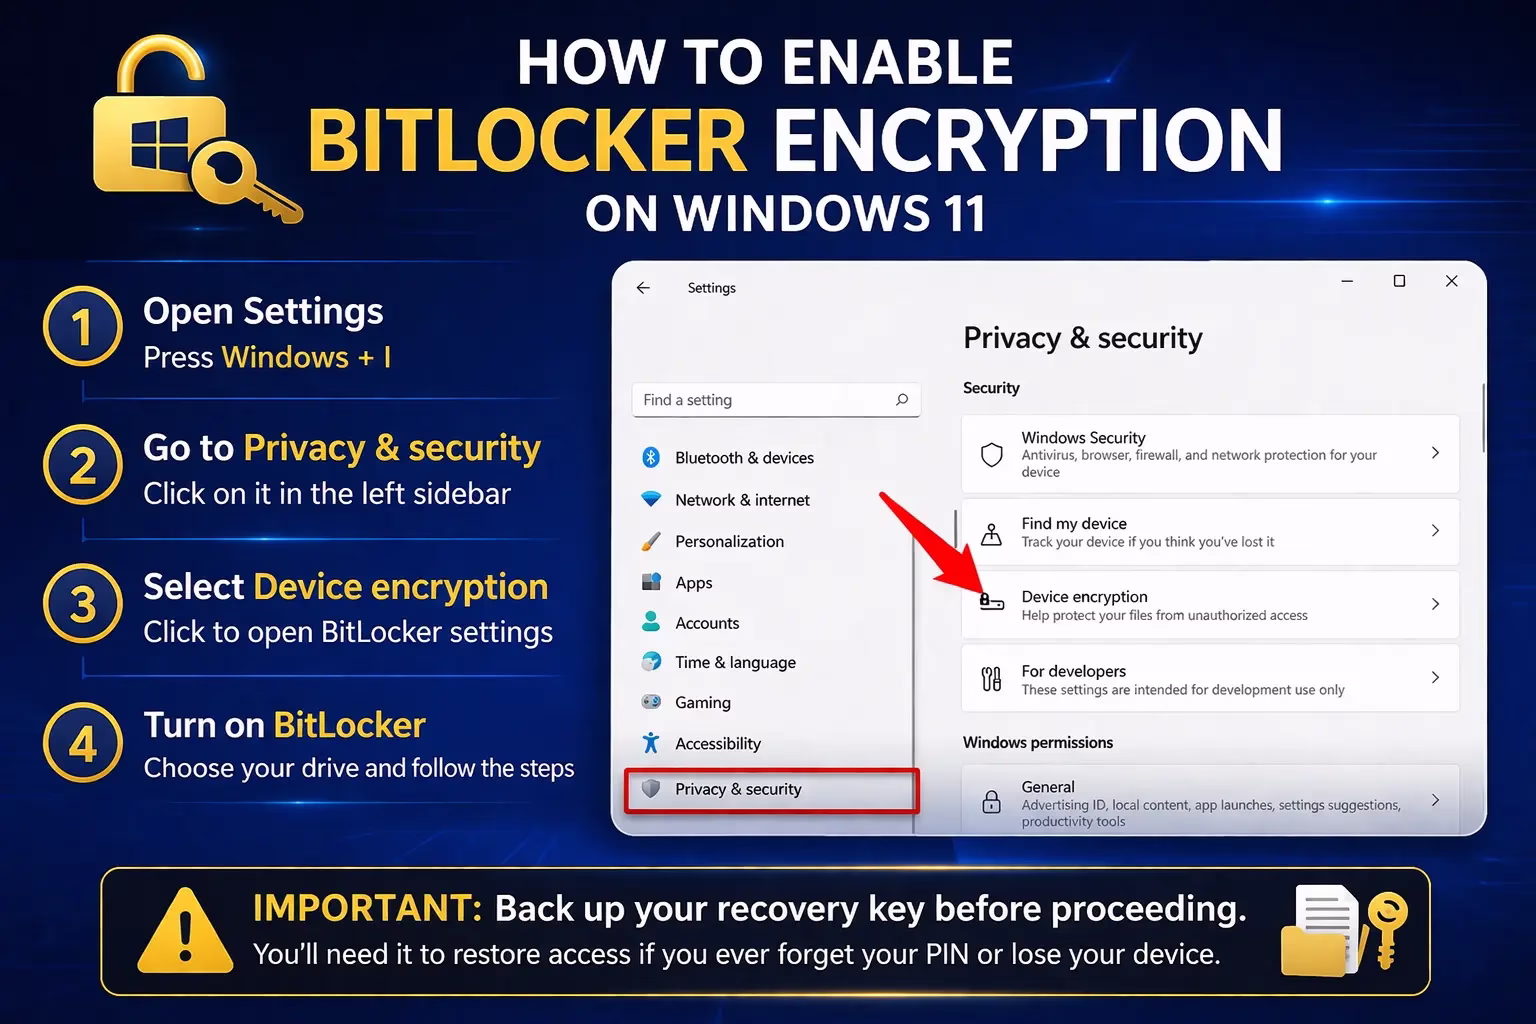
Settings path:
Control Panel → System and Security → BitLocker Drive Encryption
Or search “Manage BitLocker” in the Start menu.
Steps:
- Click Turn on BitLocker for your C:\ (system) drive
- Choose how to save your recovery key — save to your Microsoft account AND print/write it down
- Select “Encrypt entire drive” (not just used space) for complete protection
- Choose New encryption mode (XTS-AES) for drives that stay in this PC
- Run a BitLocker system check and restart
Availability note: BitLocker is available on Windows 11 Pro, Enterprise, and Education. Windows 11 Home users get “Device Encryption” — a simplified version accessible via Settings → Privacy & Security → Device Encryption.
🔑 Critical: Store your recovery key somewhere physically separate from your device. Losing it means permanent data loss — there is no backdoor, even for Microsoft.
Tip: Use Hasleo BitLocker Anywhere, a third-party tool designed primarily to bring full BitLocker encryption functionality to Windows Home editions, which lack native encryption capabilities. While Windows’ built-in BitLocker (Pro/Enterprise) is free, deeply integrated, and supports TPM, Hasleo provides a paid solution for Home users to encrypt, decrypt, and manage drives using the same encryption algorithms.
🌐 5. Firewall and Network Profile Settings
Windows Firewall monitors all incoming and outgoing network traffic. It is enabled by default but often misconfigured — particularly the network profile setting.
Settings path:
Windows Security → Firewall & Network Protection
What to verify:
- ✅ Firewall is ON for Domain, Private, and Public networks — all three should show green
- ✅ Your home Wi-Fi is set to Private network — go to Settings → Network & Internet → Wi-Fi → your network name → Properties → set to Private
- ✅ Any unknown or café/airport network is set to Public — this disables network discovery and file sharing automatically
Advanced: Check active firewall rules
Search for “Windows Defender Firewall with Advanced Security” → Inbound Rules. Look for any rules created by apps you don’t recognize. Right-click and disable anything suspicious.
⚠️ Red flag: Some game launchers and remote access tools disable or punch wide-open holes in your firewall during installation. Always review new inbound rules after installing software.
👤 6. Account Security: Admin, Standard Users, and 2FA
How your user account is configured determines how much damage malware can do if it ever gets in. Running as administrator 24/7 is one of the riskiest habits on Windows.
The standard account principle:
- Create a Standard user account for your daily use — Settings → Accounts → Family & other users → Add account
- Keep one Administrator account separate, used only for software installation or system changes
- Malware running under a standard account has severely limited ability to modify system files or install persistent backdoors
Enable 2FA on your Microsoft account:
- Go to account.microsoft.com/security
- Click Advanced security options
- Enable Two-step verification using the Microsoft Authenticator app
This protects your Microsoft account from remote takeover — which would otherwise give attackers access to OneDrive files, Outlook email, and any saved passwords in Edge.
⚙️ 7. Core Isolation and Memory Integrity (Often Overlooked)
This is the most underused Windows 11 security feature — and one of the most powerful. Core Isolation uses hardware virtualization to protect core OS processes from kernel-level malware (rootkits and bootkits that load before Windows itself).

Settings path:
Windows Security → Device Security → Core Isolation Details
Enable:
- ✅ Memory Integrity — toggle ON, then restart your PC
If you see a warning about incompatible drivers: Note the driver name, search online for an updated version, install it, then enable Memory Integrity. Outdated drivers from older hardware are the most common blocker.
Also check under Device Security:
- Secure Boot — should show as “Secure Boot is on” (configured in BIOS/UEFI, not Windows)
- TPM 2.0 — required for Windows 11; verify it shows as active
💡 Why this matters: Rootkits are the hardest malware to detect and remove because they run at a level below the antivirus. Memory Integrity makes this attack category nearly impossible on modern hardware.
🔎 8. Privacy Settings Windows Doesn’t Advertise
Windows 11 collects telemetry, advertising data, and activity history by default. Beyond privacy concerns, this data exposure is a secondary attack surface — reducing what’s collected also reduces what can be stolen.
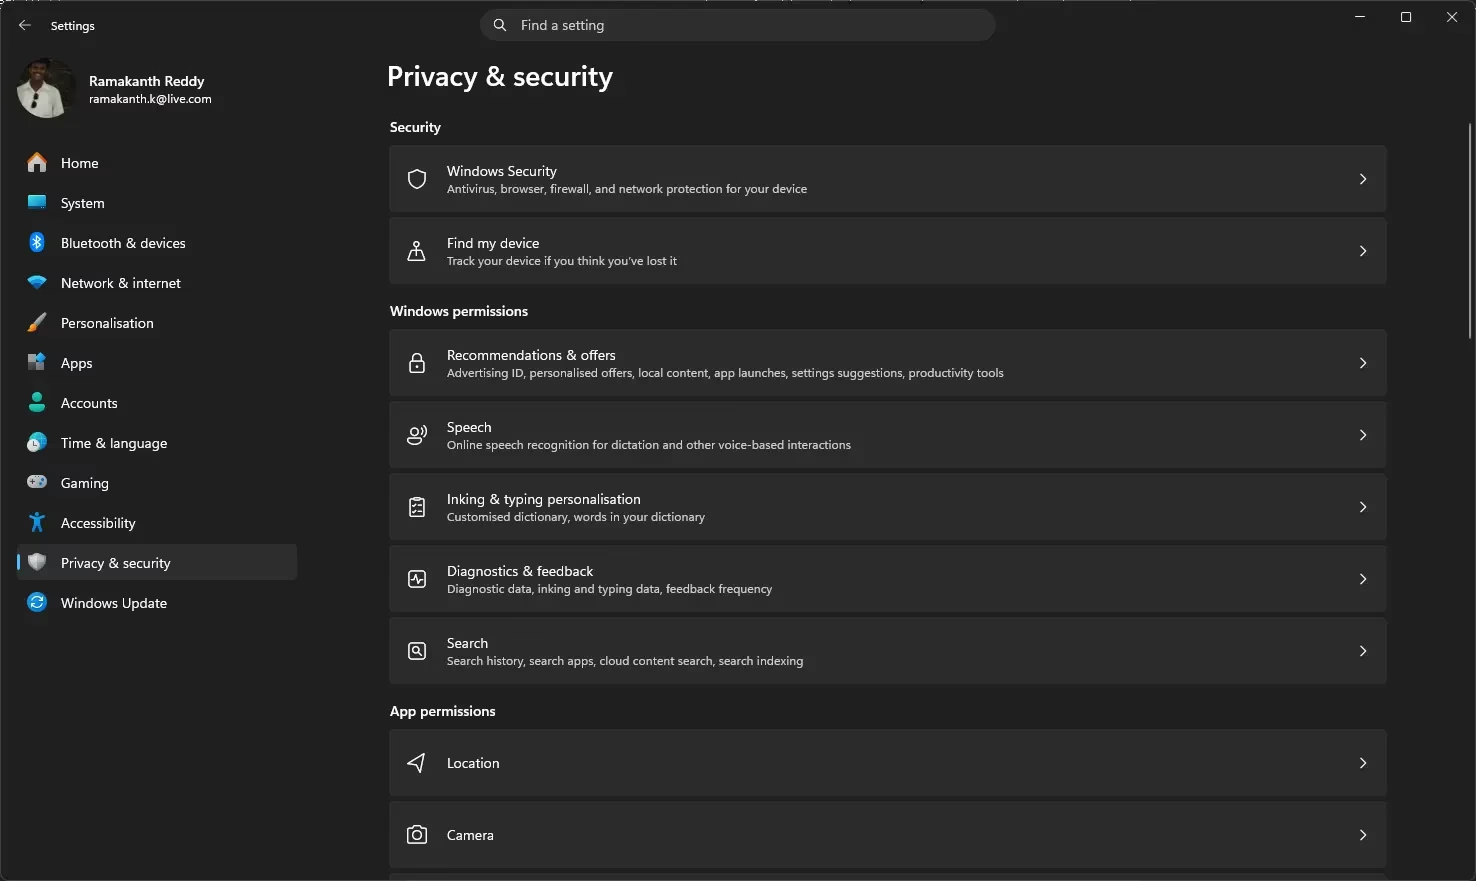
Settings path:
Settings → Privacy & Security
General—turn OFF:
- Let apps show me personalized ads using my advertising ID
- Let websites show me locally relevant content by accessing my language list
- Show me suggested content in the Settings app
Diagnostics & Feedback — set to:
- Diagnostic data → Required only (minimum level)
- Turn OFF: Improve inking and typing. Tailored experiences
Activity History — turn OFF
- Store my activity history on this device
- Clear any existing history using the “Clear history” button
App Permissions — audit these:
- Location: Turn off for apps that don’t need it; keep only Maps and Weather if desired
- Camera / Microphone: Audit which apps have access — revoke anything unexpected
- Background apps: Disable for apps you don’t use daily
🌍 9. Browser Hardening (Your Actual Biggest Attack Surface)
Statistically, more malware enters through the browser than any other vector — via malicious downloads, drive-by scripts, and phishing pages. Your browser security matters as much as your OS security.
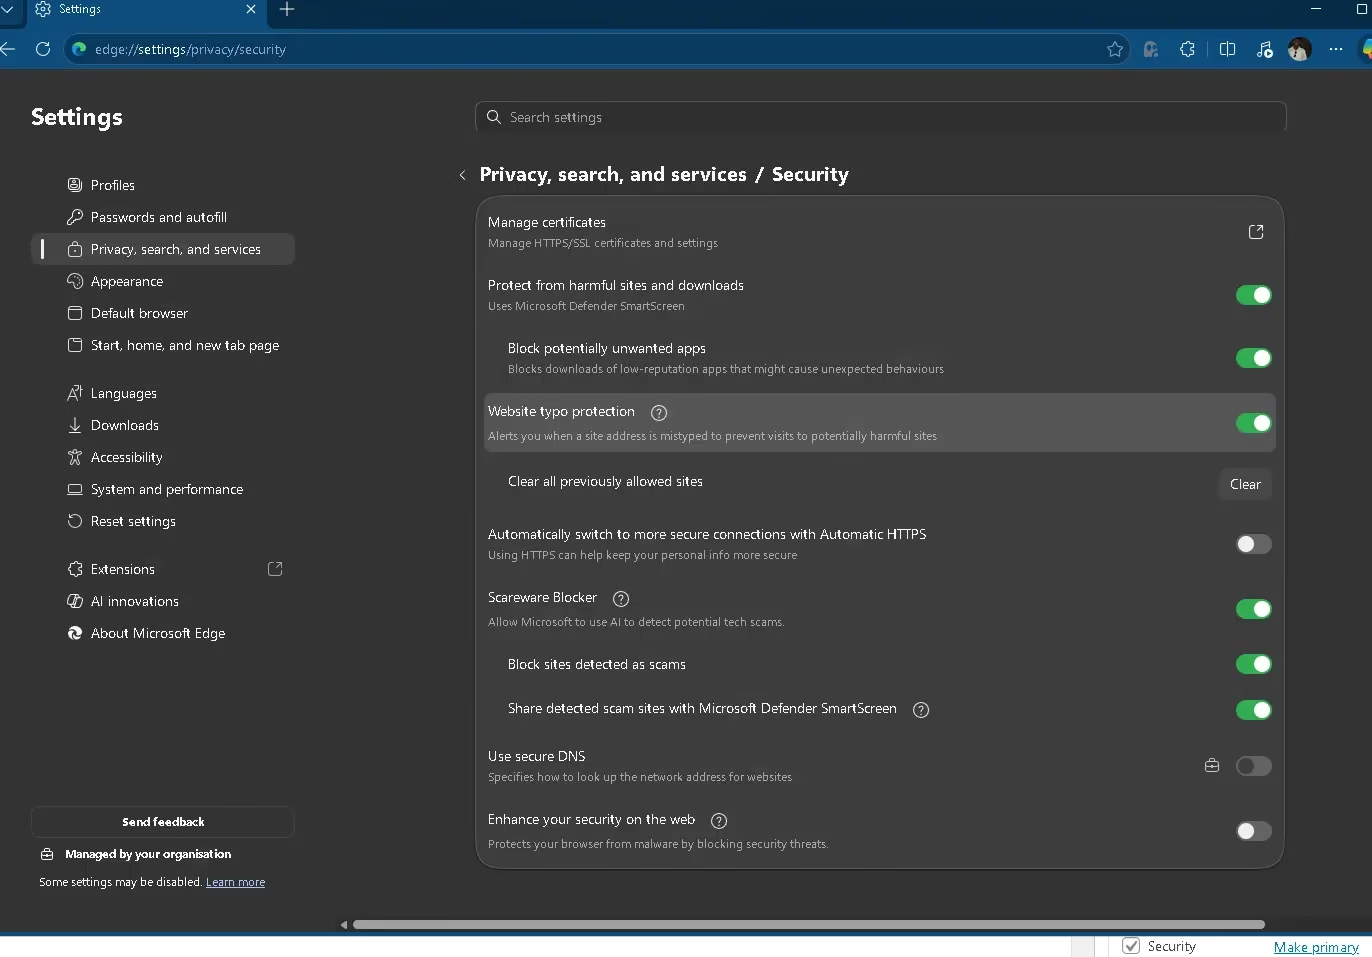
For Microsoft Edge (built-in):
Go to Edge Settings → Privacy, Search, and Services
- Enable Enhanced Security Mode (Settings → Privacy → Security → Enhance your security on the web)
- Enable Microsoft Defender SmartScreen
- Enable Block potentially unwanted apps
- Set tracking prevention to Strict

Essential extensions (any browser):
- uBlock Origin — blocks malicious ad networks and trackers; one of the most impactful free security tools available
- A password manager (Bitwarden free tier, or the built-in Edge/Chrome password manager) — prevents credential reuse across sites
Habits that matter:
- Never install extensions from outside the official store
- Check extension permissions before installing—an extension requesting “read all your data on all websites” is a red flag
- Use private/incognito mode on shared or public computers
💾 10. Backup Strategy: Your Last Line of Defence Against Ransomware
If ransomware bypasses every protection above—and occasionally something does—a solid backup strategy means recovering in hours instead of losing everything permanently.
The 3-2-1 backup rule:
- 3 copies of your data
- 2 different storage types (e.g., external SSD + cloud)
- 1 offsite or cloud copy that is not continuously connected to your PC
Built-in Windows options:
- File History — Settings → System → Storage → Advanced storage settings → Backup options (backs up to external drive automatically)
- OneDrive—backs up Desktop, Documents, Pictures to cloud; ensure versioning is enabled
Critical caveat: A backup drive permanently connected to your PC will also be encrypted by ransomware. Disconnect your backup drive after each backup session, or use a cloud service that keeps version history (so you can restore a pre-infection version).
✅ Master Windows 11 Security Checklist (2026)
| Security Area | Setting / Action | Priority |
|---|---|---|
| 🔑 Authentication | Strong PIN + Windows Hello + disable auto-login | 🔴 Critical |
| 🔄 Updates | Automatic updates ON (including optional) | 🔴 Critical |
| 🛡️ Defender | Real-time + Cloud + Tamper + Ransomware protection | 🔴 Critical |
| 🔐 BitLocker | Full-disk encryption ON + recovery key backed up | 🔴 Critical |
| 🌐 Firewall | ON for all profiles + correct network type set | 🔴 Critical |
| 👤 Accounts | Standard user for daily use + 2FA on Microsoft account | 🟠 High |
| ⚙️ Core Isolation | Memory Integrity ON | 🟠 High |
| 🔎 Privacy | Advertising ID OFF + Diagnostics = Required only | 🟠 High |
| 🌍 Browser | Enhanced Security + uBlock Origin + password manager | 🟠 High |
| 💾 Backup | 3-2-1 rule with at least one offline or cloud copy | 🟡 Important |
❓ Frequently Asked Questions
Which Windows 11 security settings should I enable first?
Start with the highest-impact trio: enable BitLocker disk encryption, turn on Tamper Protection and Ransomware Protection in Microsoft Defender, and activate Core Isolation (Memory Integrity) under Device Security. These three address the most critical attack surfaces — physical theft, malware, and kernel-level exploits.
Does enabling all security settings slow down Windows 11?
Minimally. BitLocker has near-zero overhead on modern SSDs with TPM 2.0. Core Isolation (Memory Integrity) may cause a 1–3% performance dip on older CPUs. Microsoft Defender’s real-time protection has been highly optimized since Windows 11 22H2. The security gains far outweigh any negligible performance cost.
Is Windows Defender enough in 2026, or do I need third-party antivirus?
For most home users, Microsoft Defender — fully configured with cloud protection, tamper protection, and ransomware protection enabled — is sufficient. Independent lab tests consistently rate it 99%+ detection. Third-party antivirus adds value mainly for managed business environments or users with very specific threat models.
What happens if I lose my BitLocker recovery key?
You will permanently lose access to your encrypted data. Always back up your recovery key in at least two places: your Microsoft account (Settings → Accounts → BitLocker recovery) and a printed or physically stored copy. Never store it only on the same device it protects.
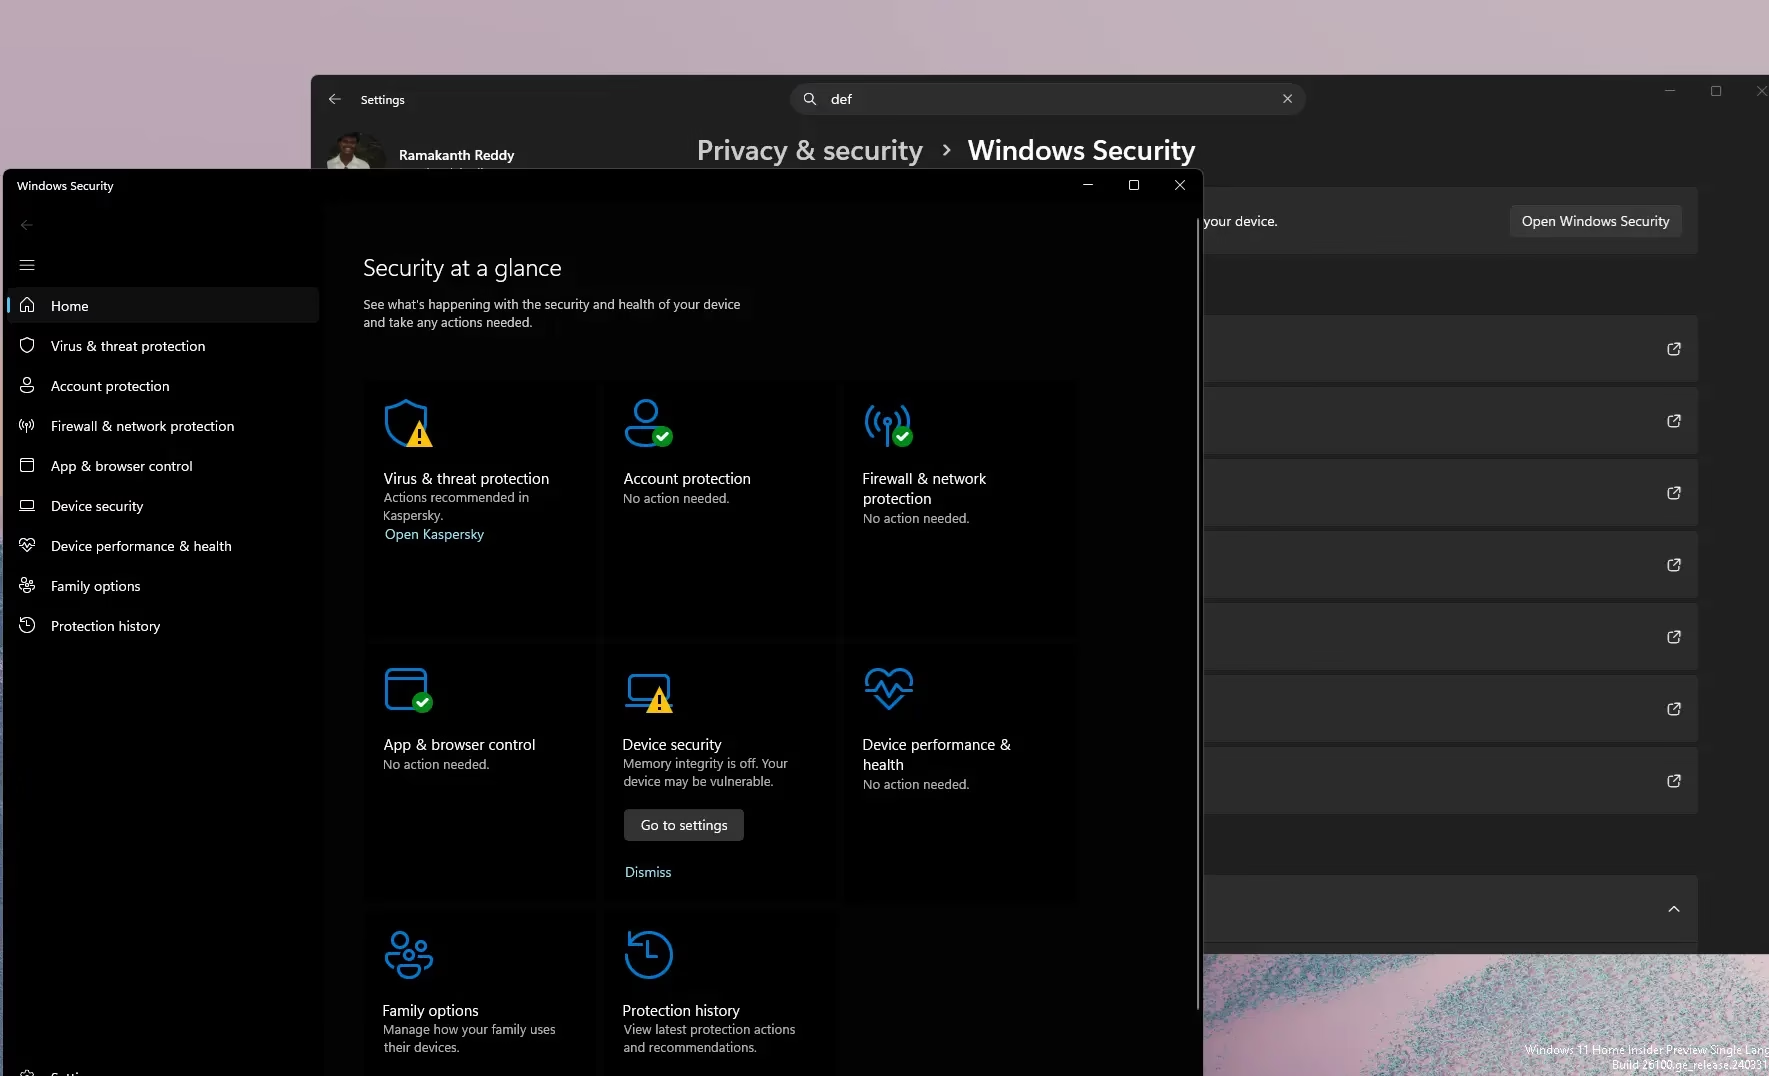
How do I check if my Windows 11 security settings are correctly configured?
Open the Windows Security app (search “Windows Security” in Start). Every category should display a green checkmark — Virus & Threat Protection, Account Protection, Firewall & Network Protection, App & Browser Control, Device Security, and Device Performance & Health. Any yellow warning icon means a setting needs attention.
🔐 Final Thoughts
Security is not a product you buy once — it is a configuration you maintain. The settings in this guide are not advanced or optional extras. They are the baseline your system should have been shipped with.
Work through the checklist once, verify the green lights in Windows Security, and set calendar reminders to review your update status monthly. That single routine eliminates the vast majority of real-world PC security risks — without spending a rupee.
The most secure system is the one you actually configured.
📌 Related Articles:


