
MAC APP REVIEW · HANDS-ON TESTED
A tiny 1.9 MB Mac screen recorder that captures system audio, auto-zooms on clicks and reads text from your screen
We put Window Capture 1.0.2 through window, display and area recordings, a 4-minute Pro session, GIF export, OCR and microphone tests on a MacBook Air M3 running macOS Tahoe 26.6.2. Here’s what worked, what didn’t, and whether the ₹799 Pro upgrade is worth it.
⚡ Quick Read
- What it is: a menu-bar style screen recorder and screenshot tool for Apple silicon Macs.
- Price: free (3 minutes per recording); Pro is a one-time ₹799 in India / $7.99 in the US. No subscription.
- Best for: quick tutorial clips, bug reports, GIFs and short demos with system audio.
- Watch out for: our full-screen Retina test came out at 1080p height, the mic and system audio are mixed into one track, and recordings are saved in a hidden app folder by default.
- Needs: macOS 15 Sequoia or later and an M1 or newer Mac. Intel Macs aren’t supported.
Download Window Capture free on the Mac App Store
What is Window Capture?
Window Capture is a Mac utility from indie developer Daisuke Inada (LLC Lifearts, Japan). It records a single window, a full display or a selected area as an MP4 video with system audio and an optional microphone, and it can also take PNG screenshots. The Pro upgrade removes the free version’s 3-minute limit and adds GIF export, click highlights, auto-zoom on clicks, automatic copy to clipboard and on-device text recognition (OCR).
The whole app is a 1.9 MB download from the Mac App Store. It runs as a compact floating capture bar rather than a full window, and it can wait in the background for a keyboard shortcut even when the bar is closed.
Looking for more useful tools? See our list of the 25 best free Mac apps in 2026.

Key specs at a glance
| Item | Details |
|---|---|
| Developer | Daisuke Inada (LLC Lifearts) |
| Version tested | 1.0.2 (build 39) |
| Requirements | macOS 15.0 or later, Apple M1 chip or later |
| Size | 1.9 MB |
| Price | Free; Pro one-time in-app purchase (₹799 India / $7.99 US) |
| Formats | MP4 (H.264 + AAC audio), GIF (Pro), PNG, text (Pro OCR) |
| Languages | English plus 8 others, including Japanese, Chinese, Korean, Spanish, French, German and Portuguese |
| Our test Mac | MacBook Air M3, macOS Tahoe 26.6.2, 2560 × 1664 Retina display |
Features
Three capture targets: window, display and area
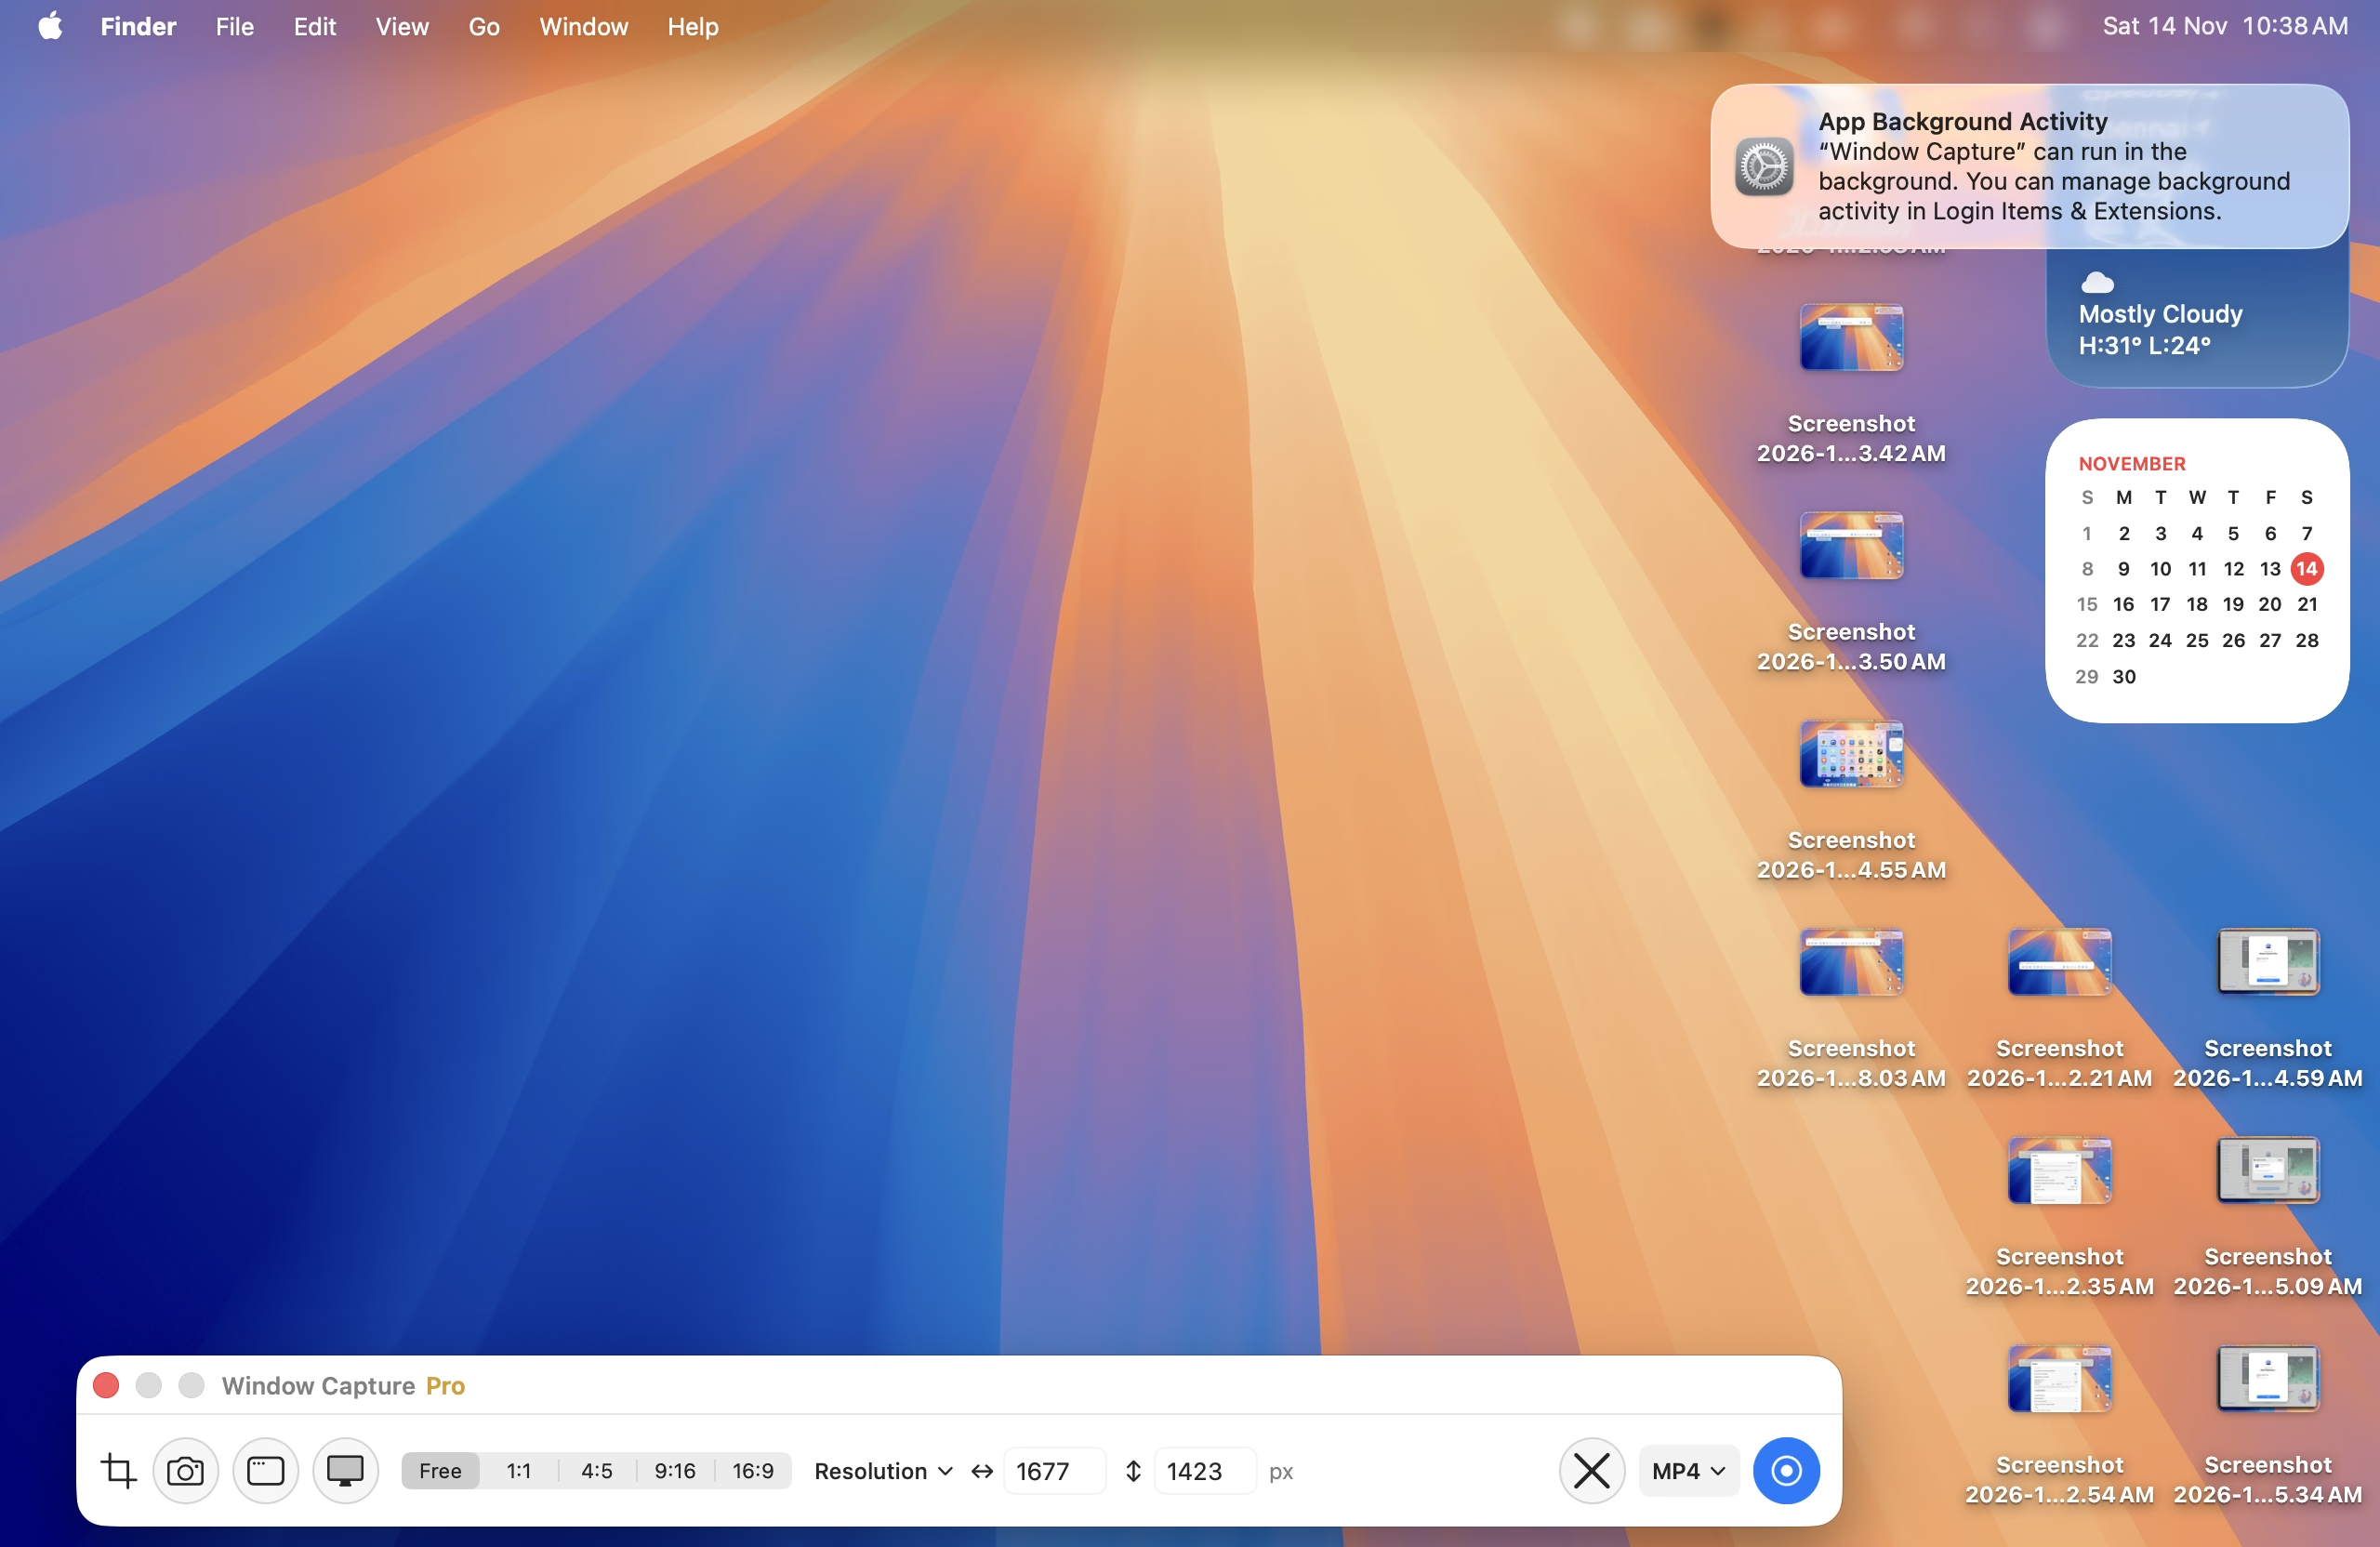
You pick what to record with three buttons on the bar. Window records one app window, Display records an entire screen (with a menu if you have more than one monitor), and Area lets you drag a rectangle. Area mode adds aspect-ratio presets (Free, 1:1, 4:5, 9:16 and 16:9), exact pixel width and height fields, and a Resolution menu. The 9:16 and 4:5 presets are handy if you make Shorts, Reels or Instagram clips.
The record button stays greyed out until you choose a target, and the bar shows “None selected” until then. That confused us for a minute on first launch, so it’s worth knowing.

System audio and microphone with live meters
Two toggles control audio: Mac (system) audio and the microphone. While you record, the bar swaps them for two live level meters, a timer and a stop button, so you can see at a glance whether sound is actually being picked up. A countdown of 3 or 5 seconds (or none) gives you time to get ready.

Preview, trim and export after every capture
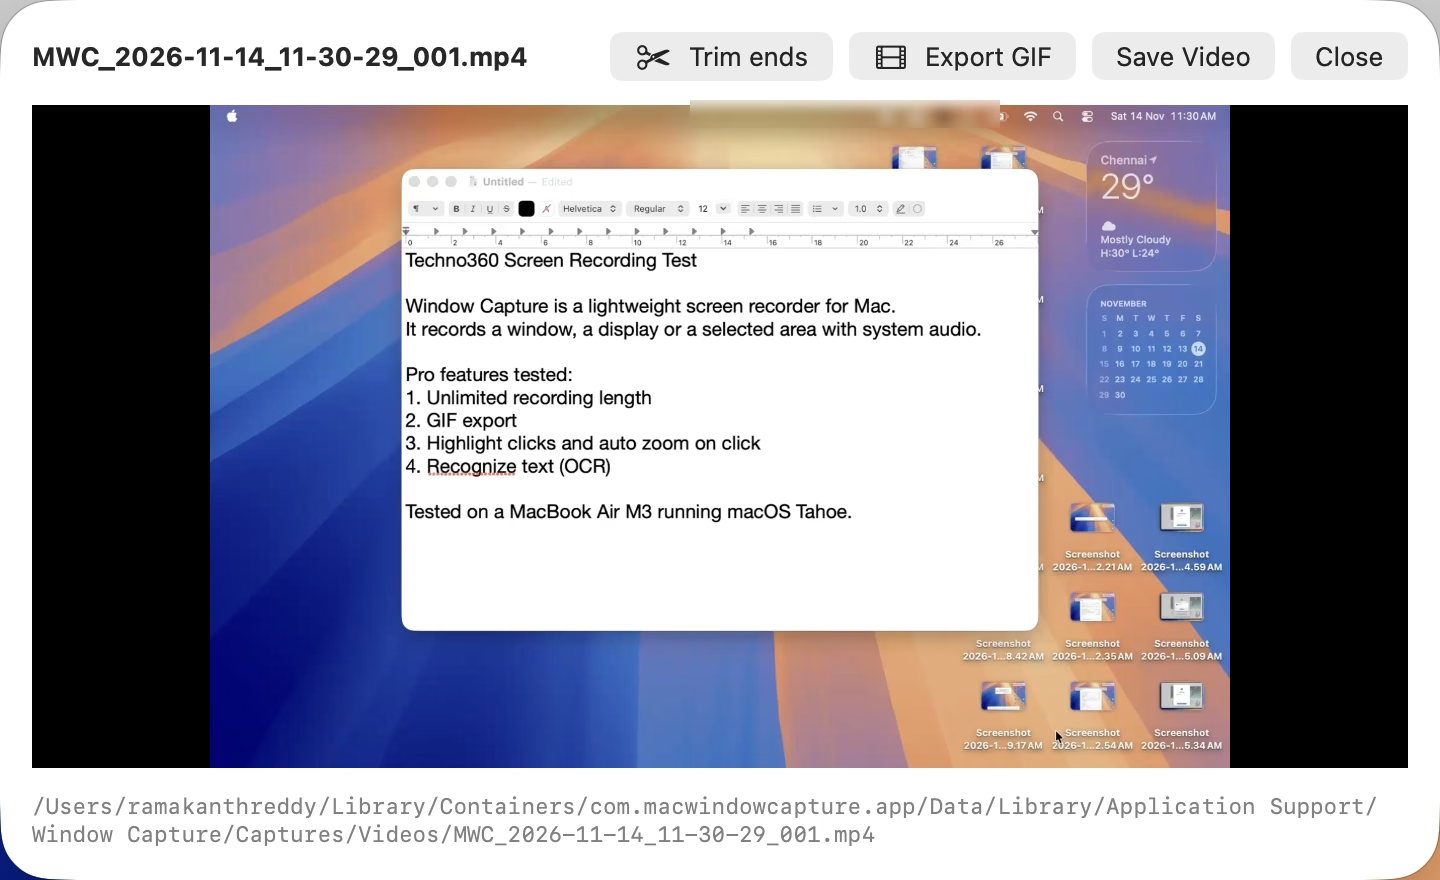
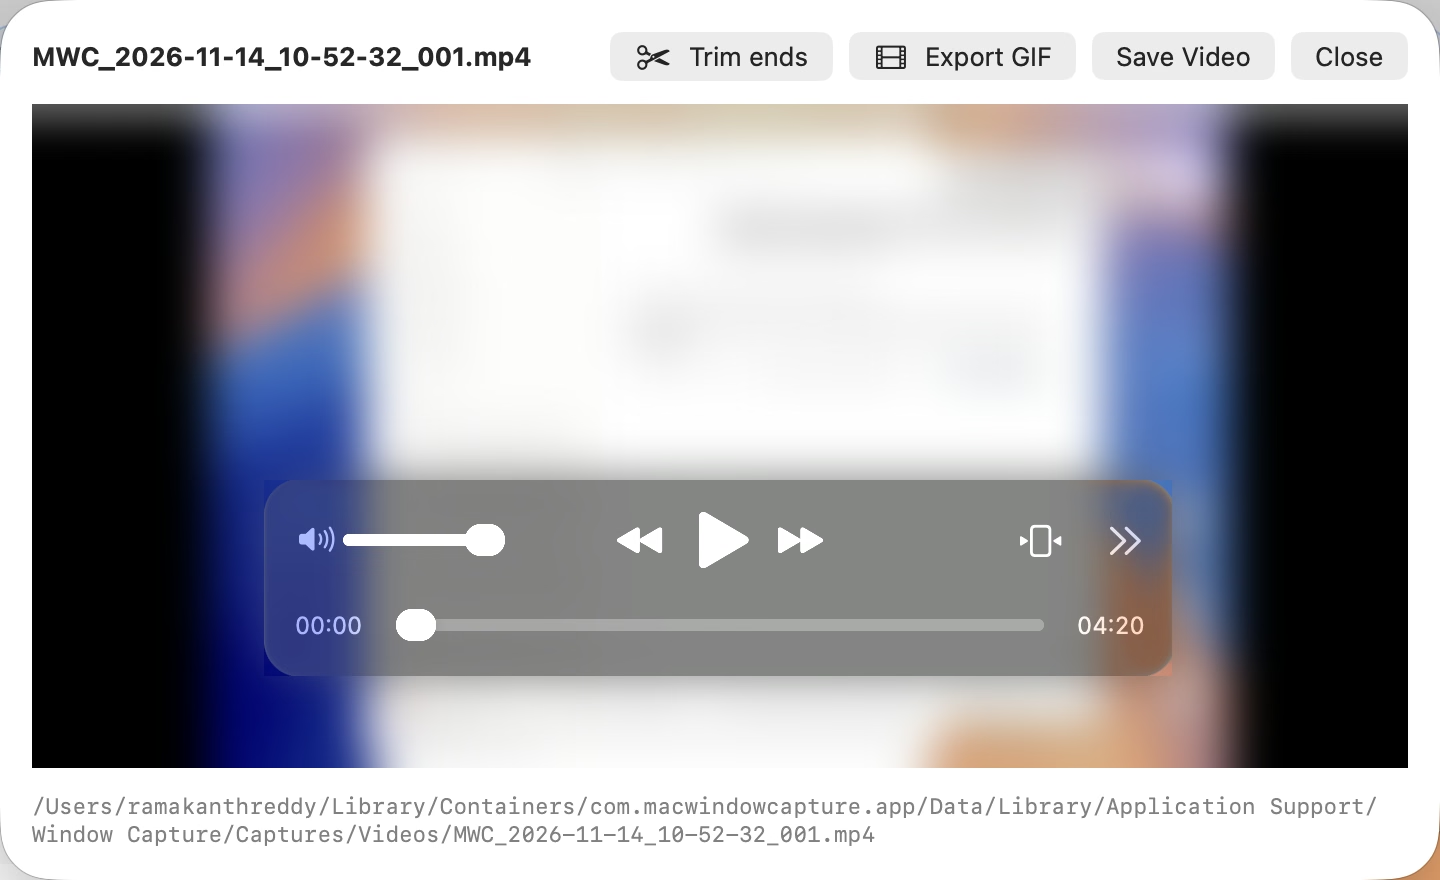
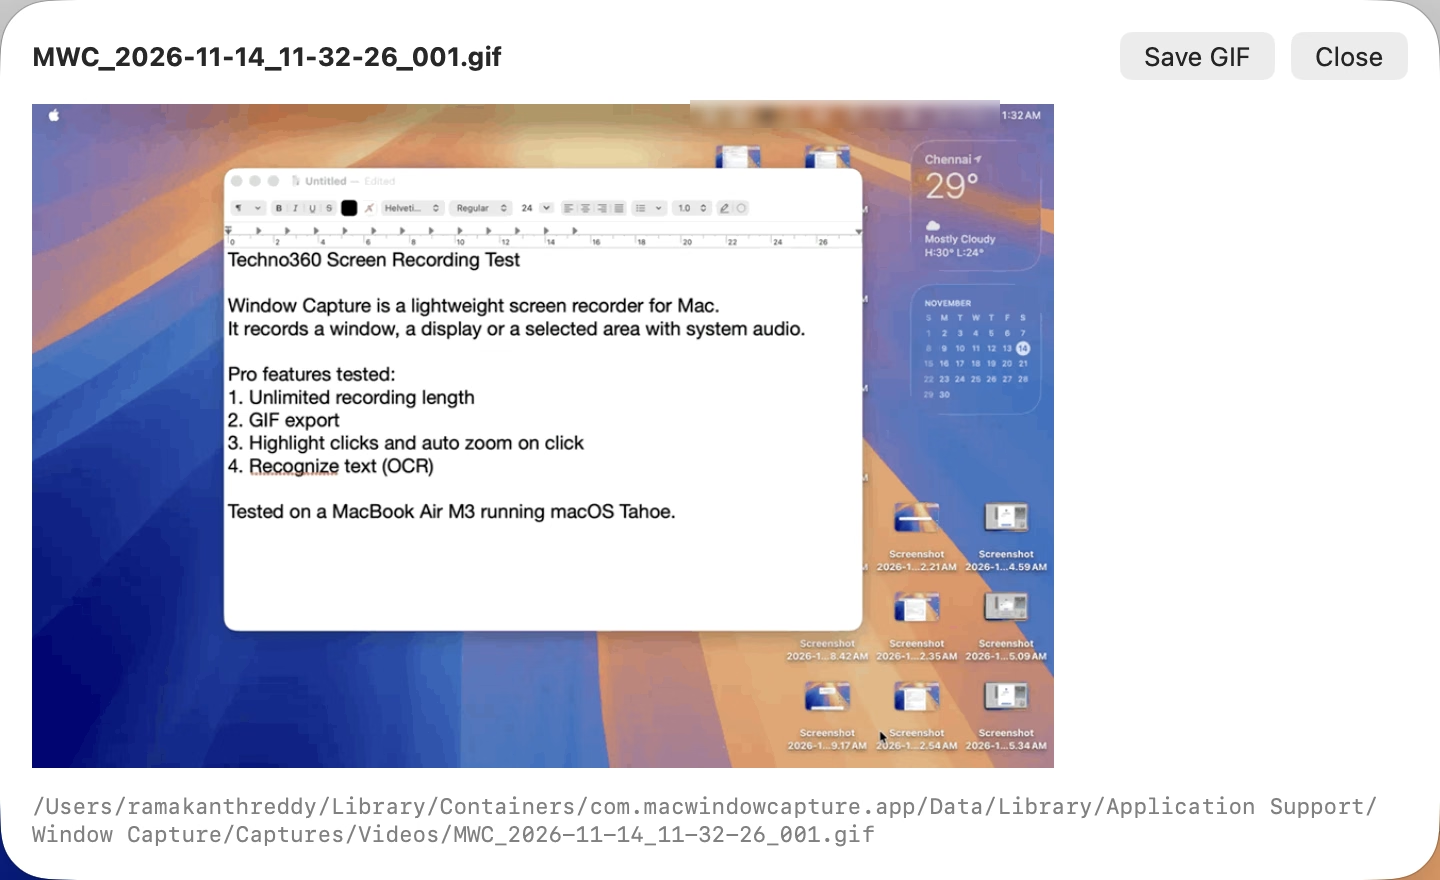
When you stop, a preview window opens with the video player and four buttons: Trim ends, Export GIF, Save Video and Close. Save Video and Export GIF open a normal macOS Save dialog, so you choose the folder and file name each time.
Pro extras: click highlights, auto-zoom, GIF and OCR
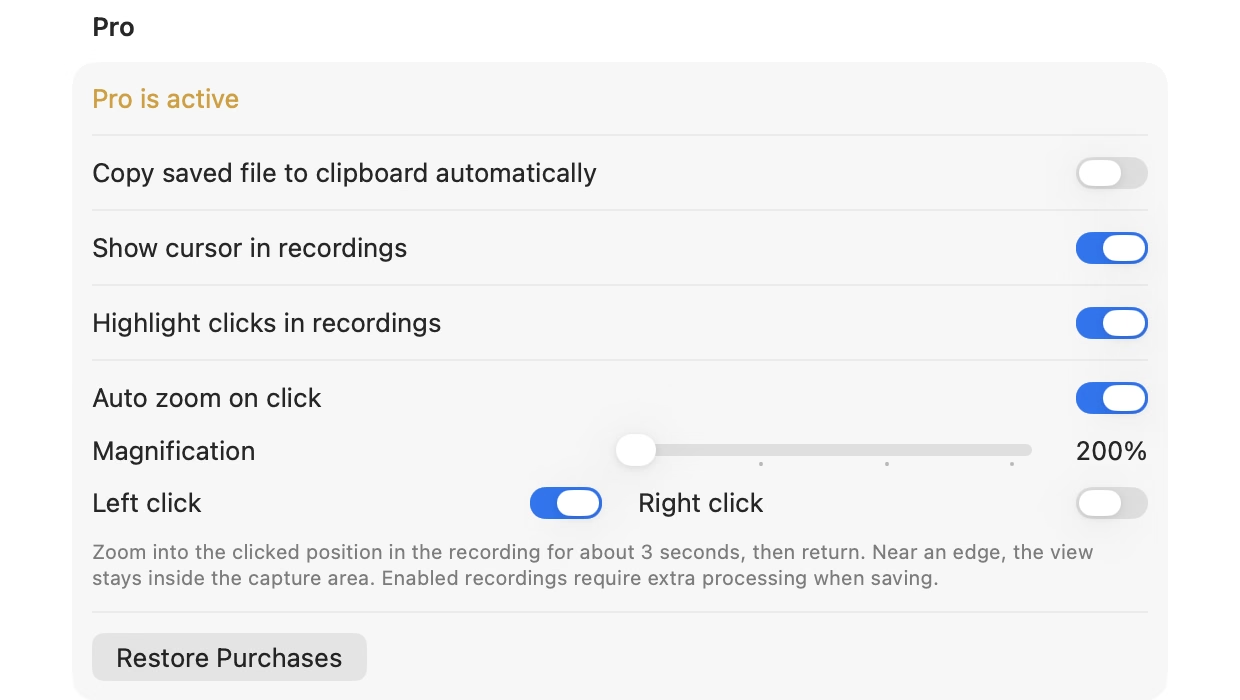
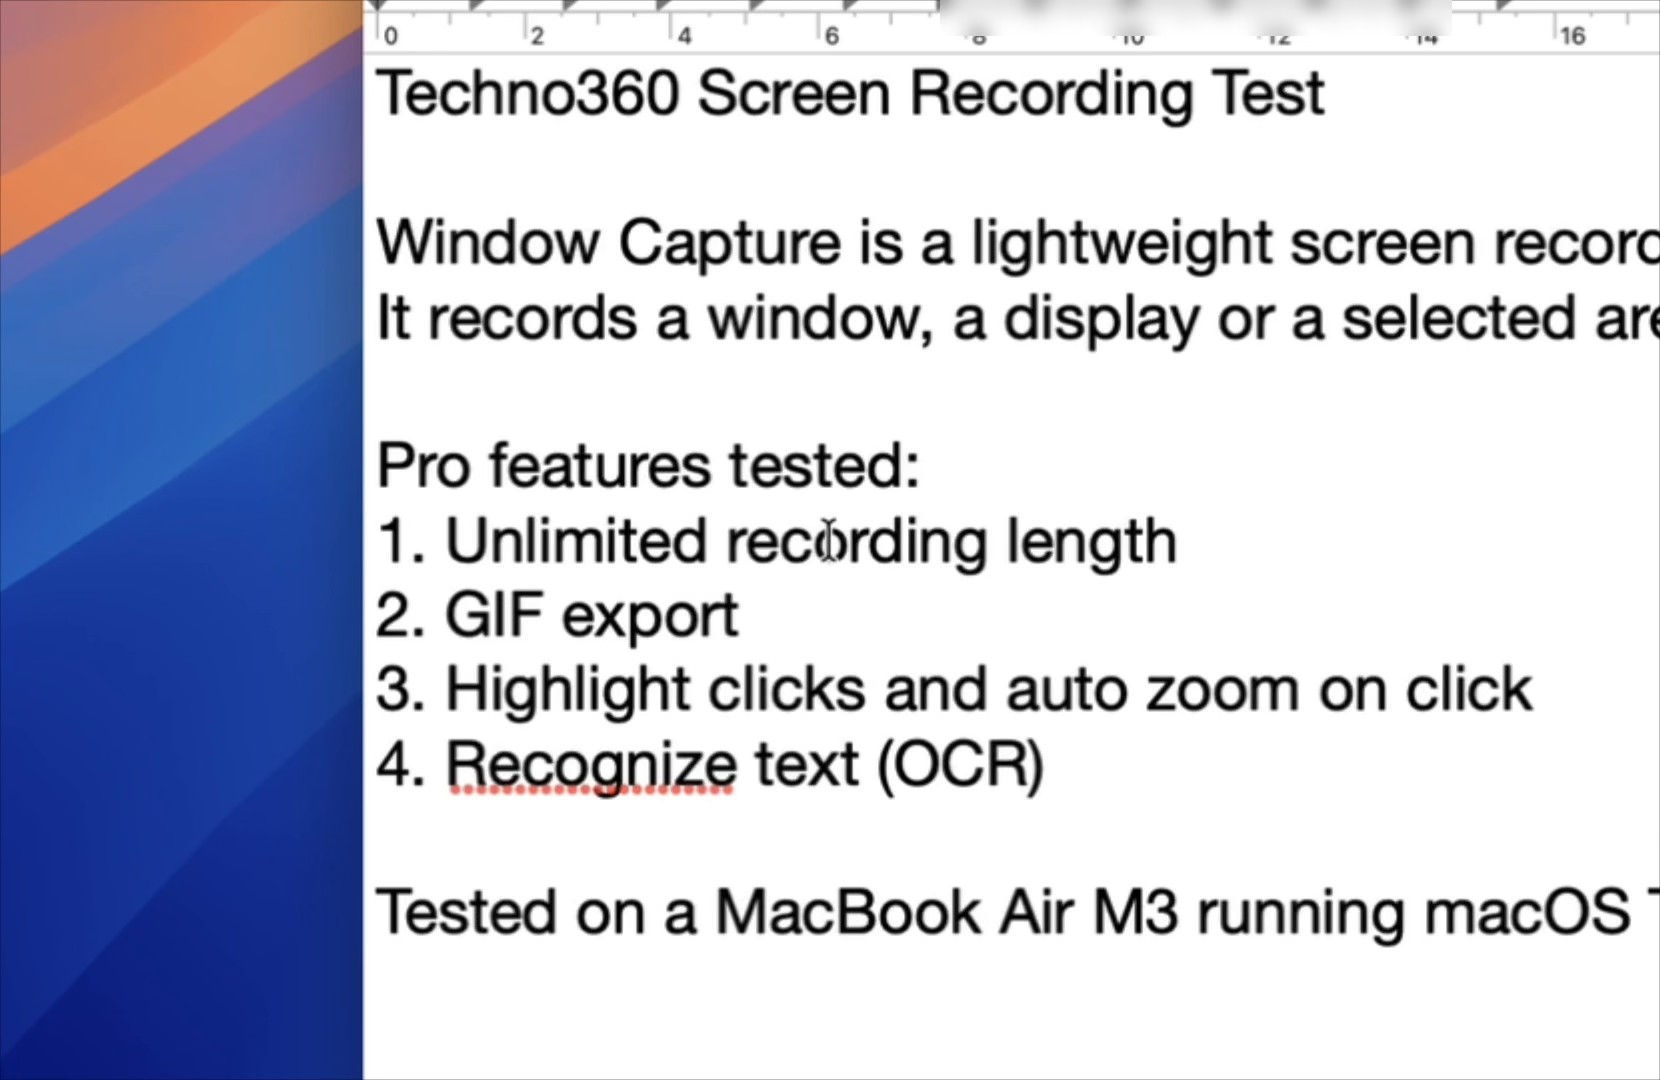
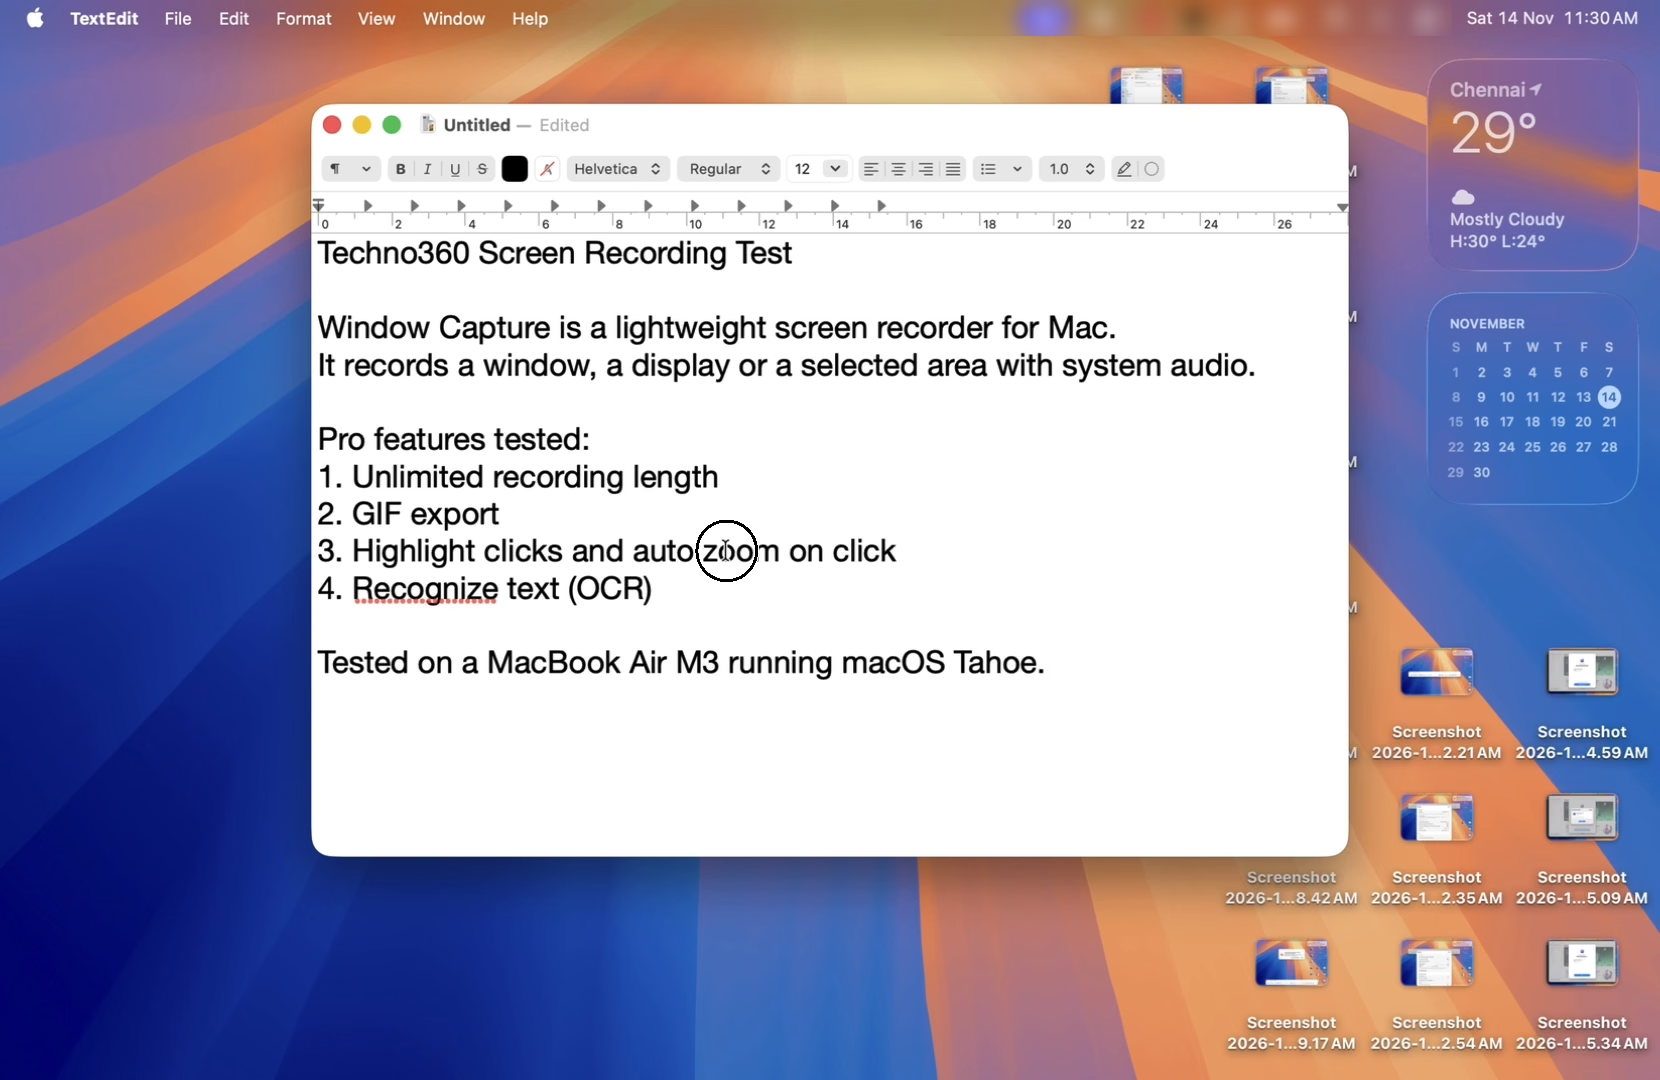
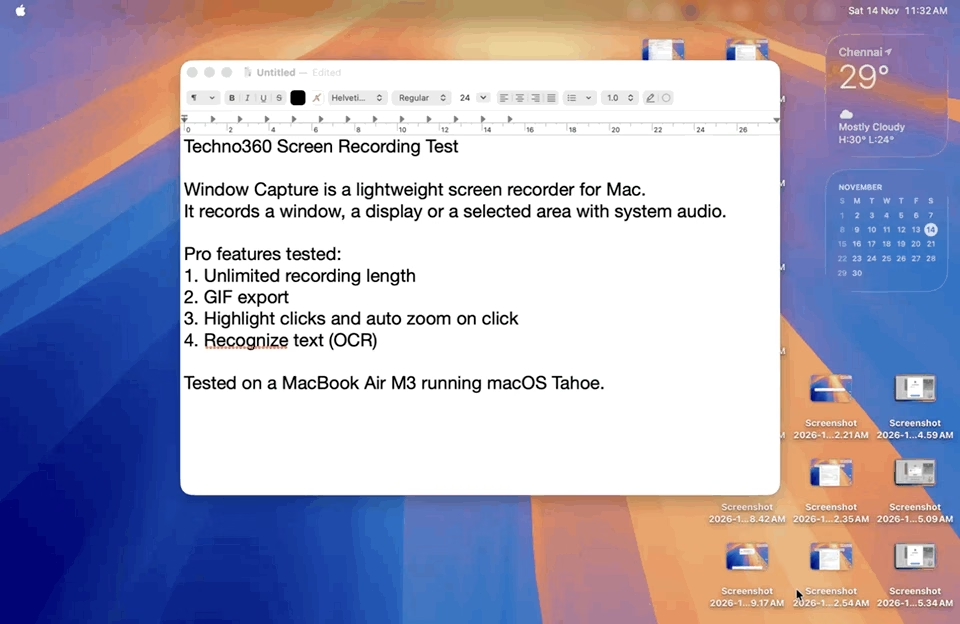
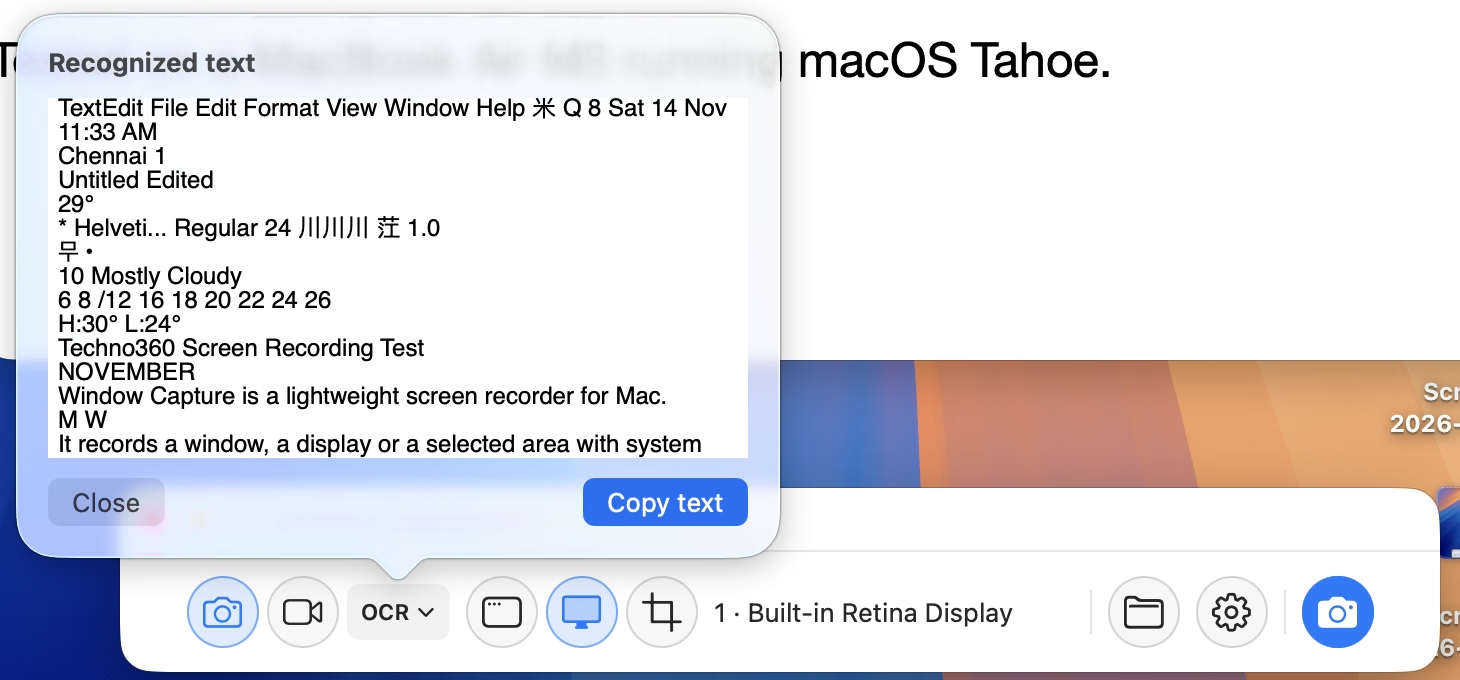
The Pro section in Settings turns on Highlight clicks in recordings and Auto zoom on click. Auto-zoom zooms into each click for about 3 seconds and then returns to the full view. You can set the magnification (200% by default) and choose left clicks, right clicks or both. Pro also adds GIF as a recording format, Recognize text in photo mode, and an option to copy every saved file to the clipboard automatically.
Keyboard shortcuts
- Control + Option + Command + R: show the capture bar (works even when the app is closed)
- Command + R: start or stop recording
- Return: take a photo, or start or stop recording
- Esc: cancel
First launch: the permissions you’ll see
Like every screen recorder on macOS, Window Capture needs your permission before it can see the screen. On our Mac it took three steps:
- Screen Recording request. On the first capture, macOS asks whether Window Capture may record the screen and audio. Click Open System Settings and switch Window Capture on under Privacy & Security → Screen & System Audio Recording.
- “Bypass the system private window picker” prompt. On our Mac, a second prompt said Window Capture “is requesting to bypass the system private window picker and directly access your screen and audio,” and warned that this could include personal or sensitive information that’s visible or audible. In short, the app wants to choose windows and displays itself rather than going through macOS’s built-in picker each time. Click Allow only if you trust the app with full access to your screen and audio.
- Microphone request. This only appears when you turn on the mic toggle for the first time.
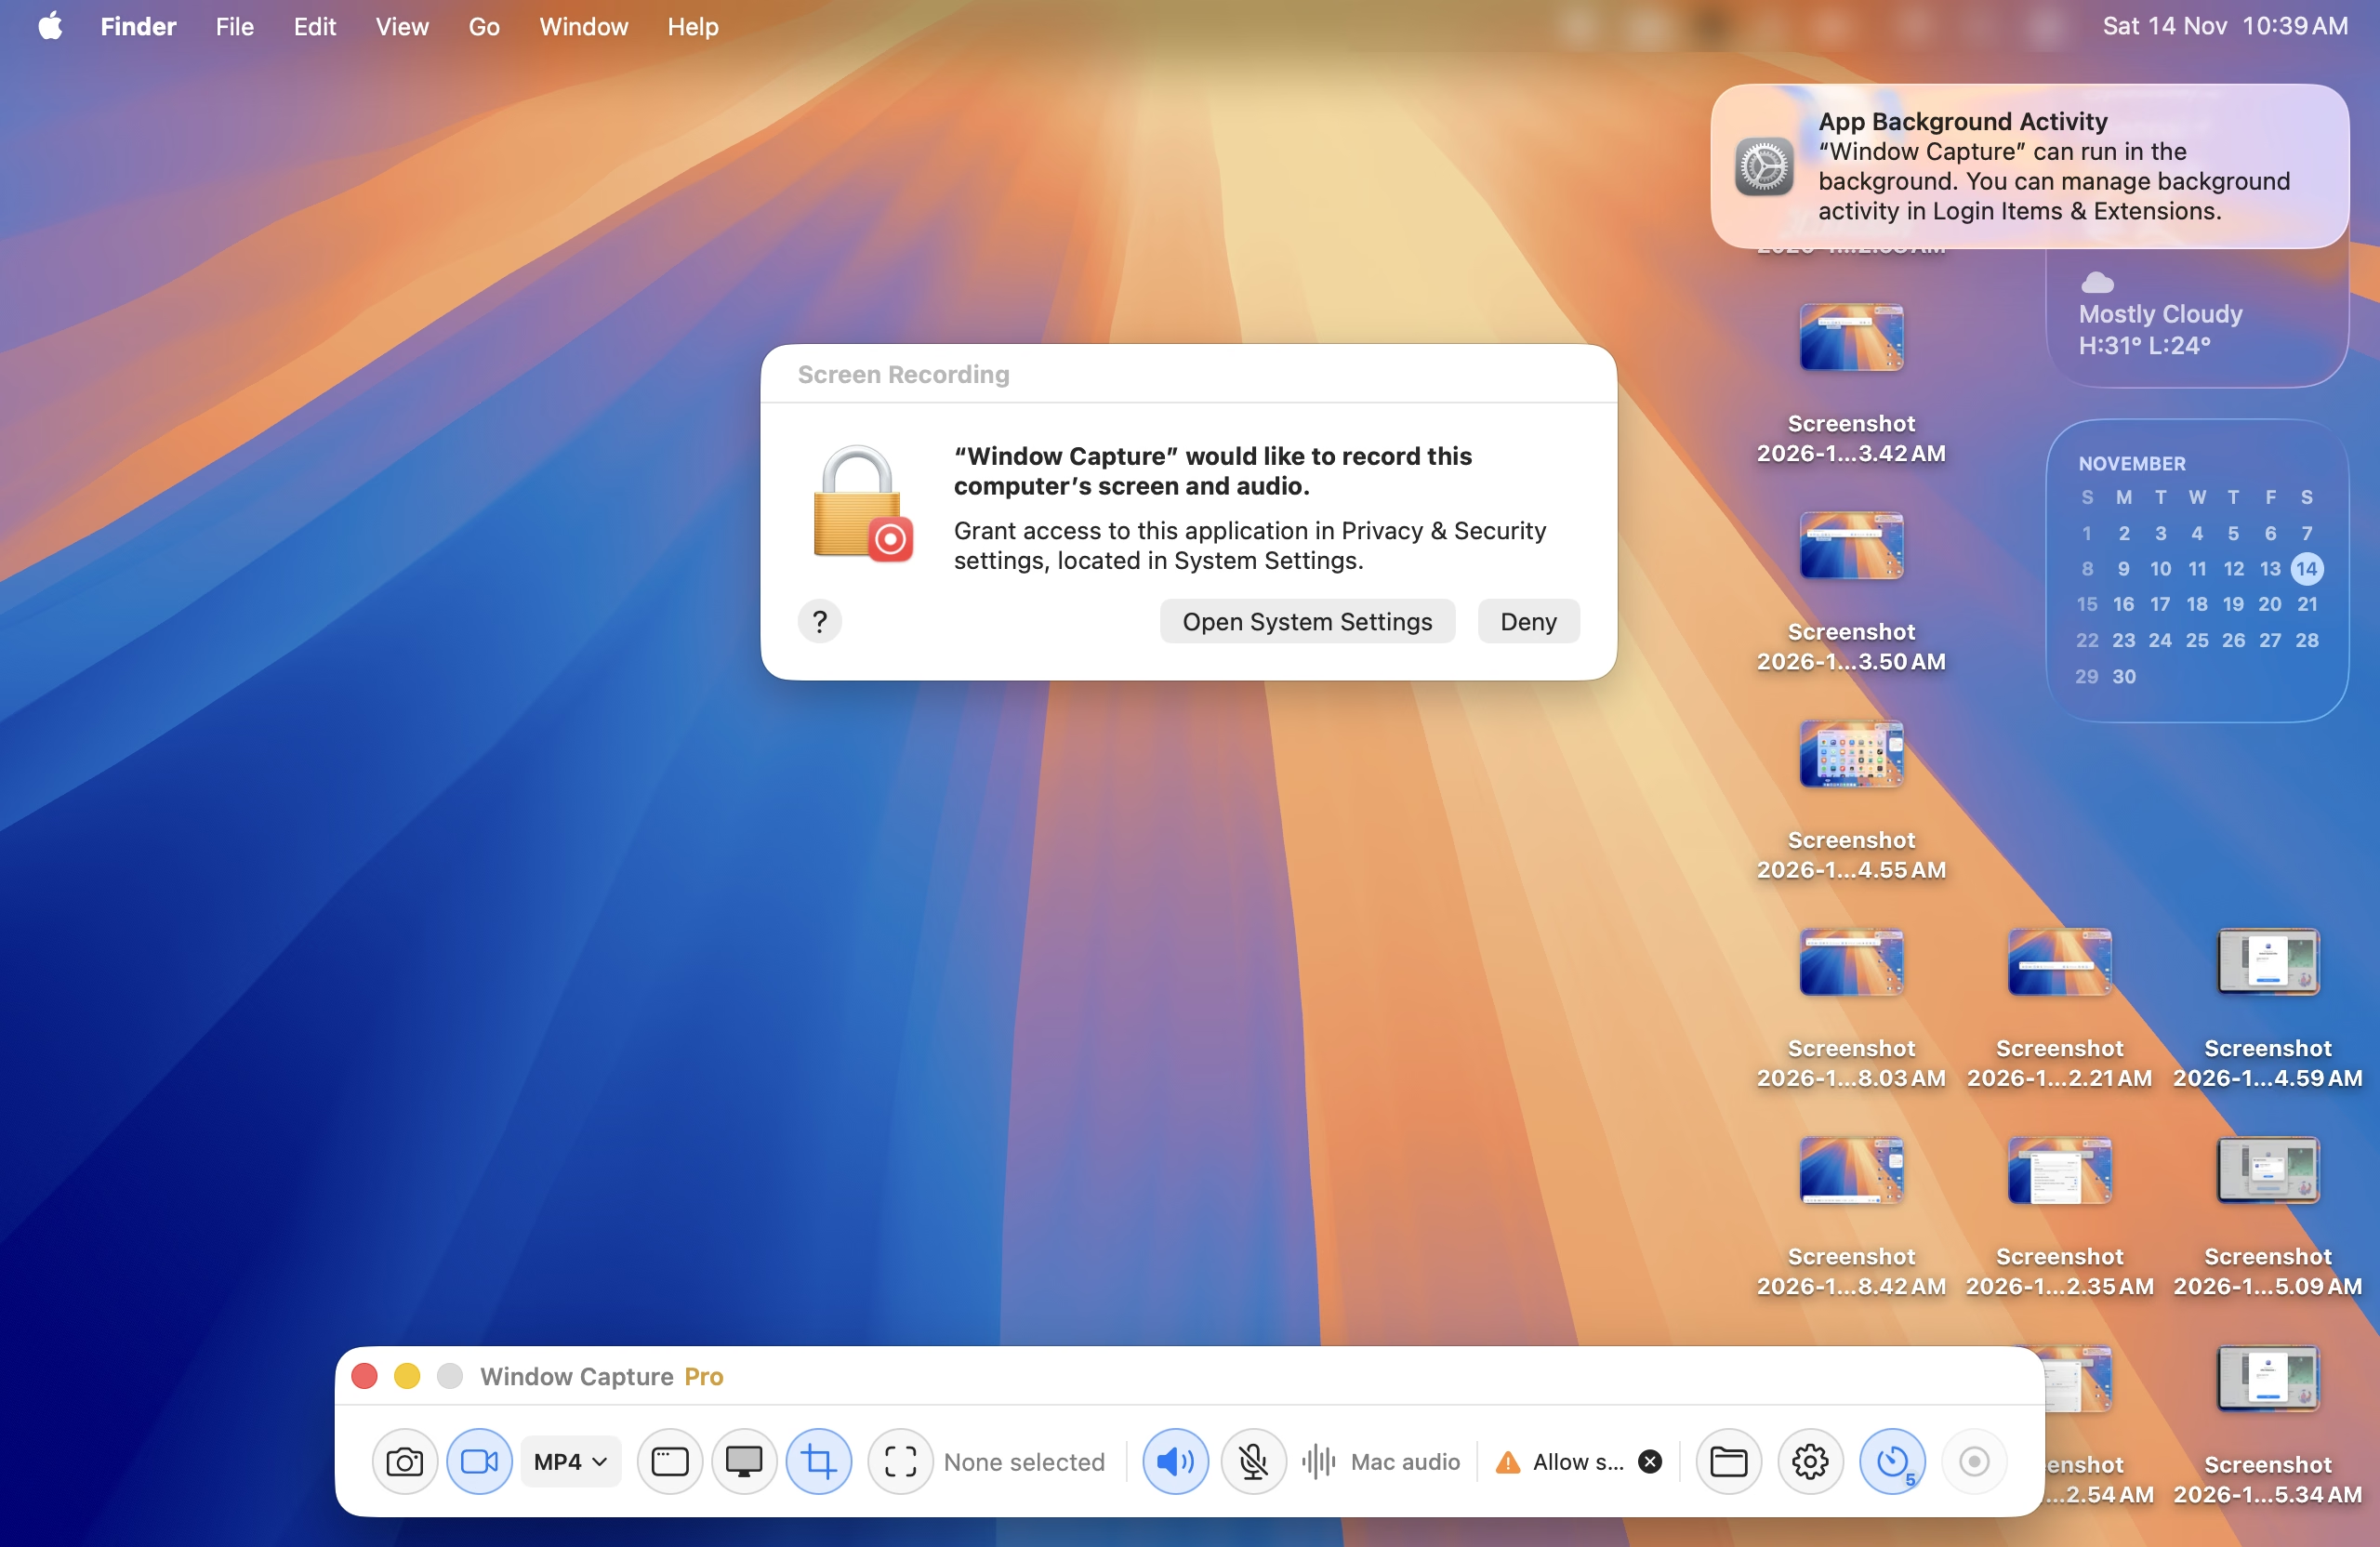
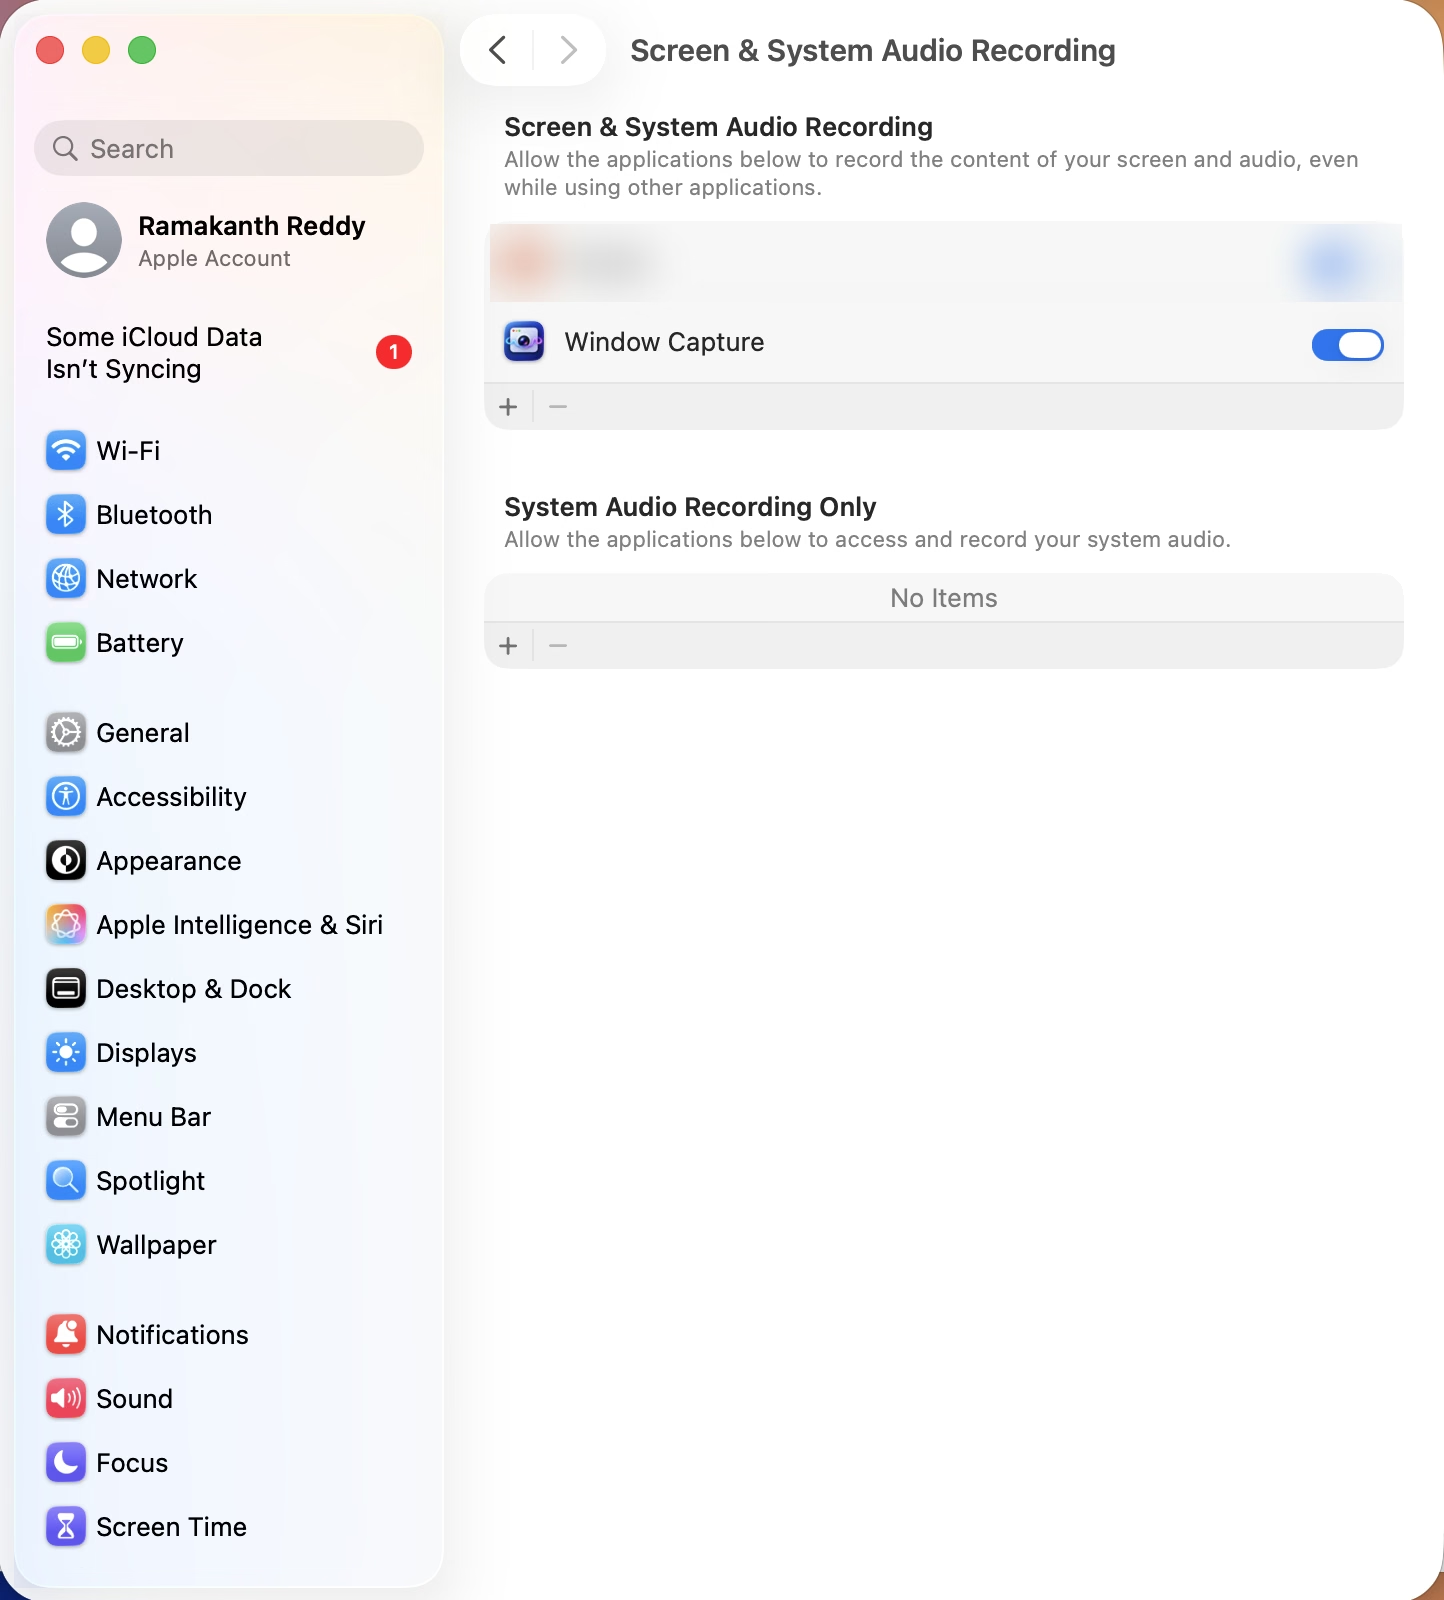
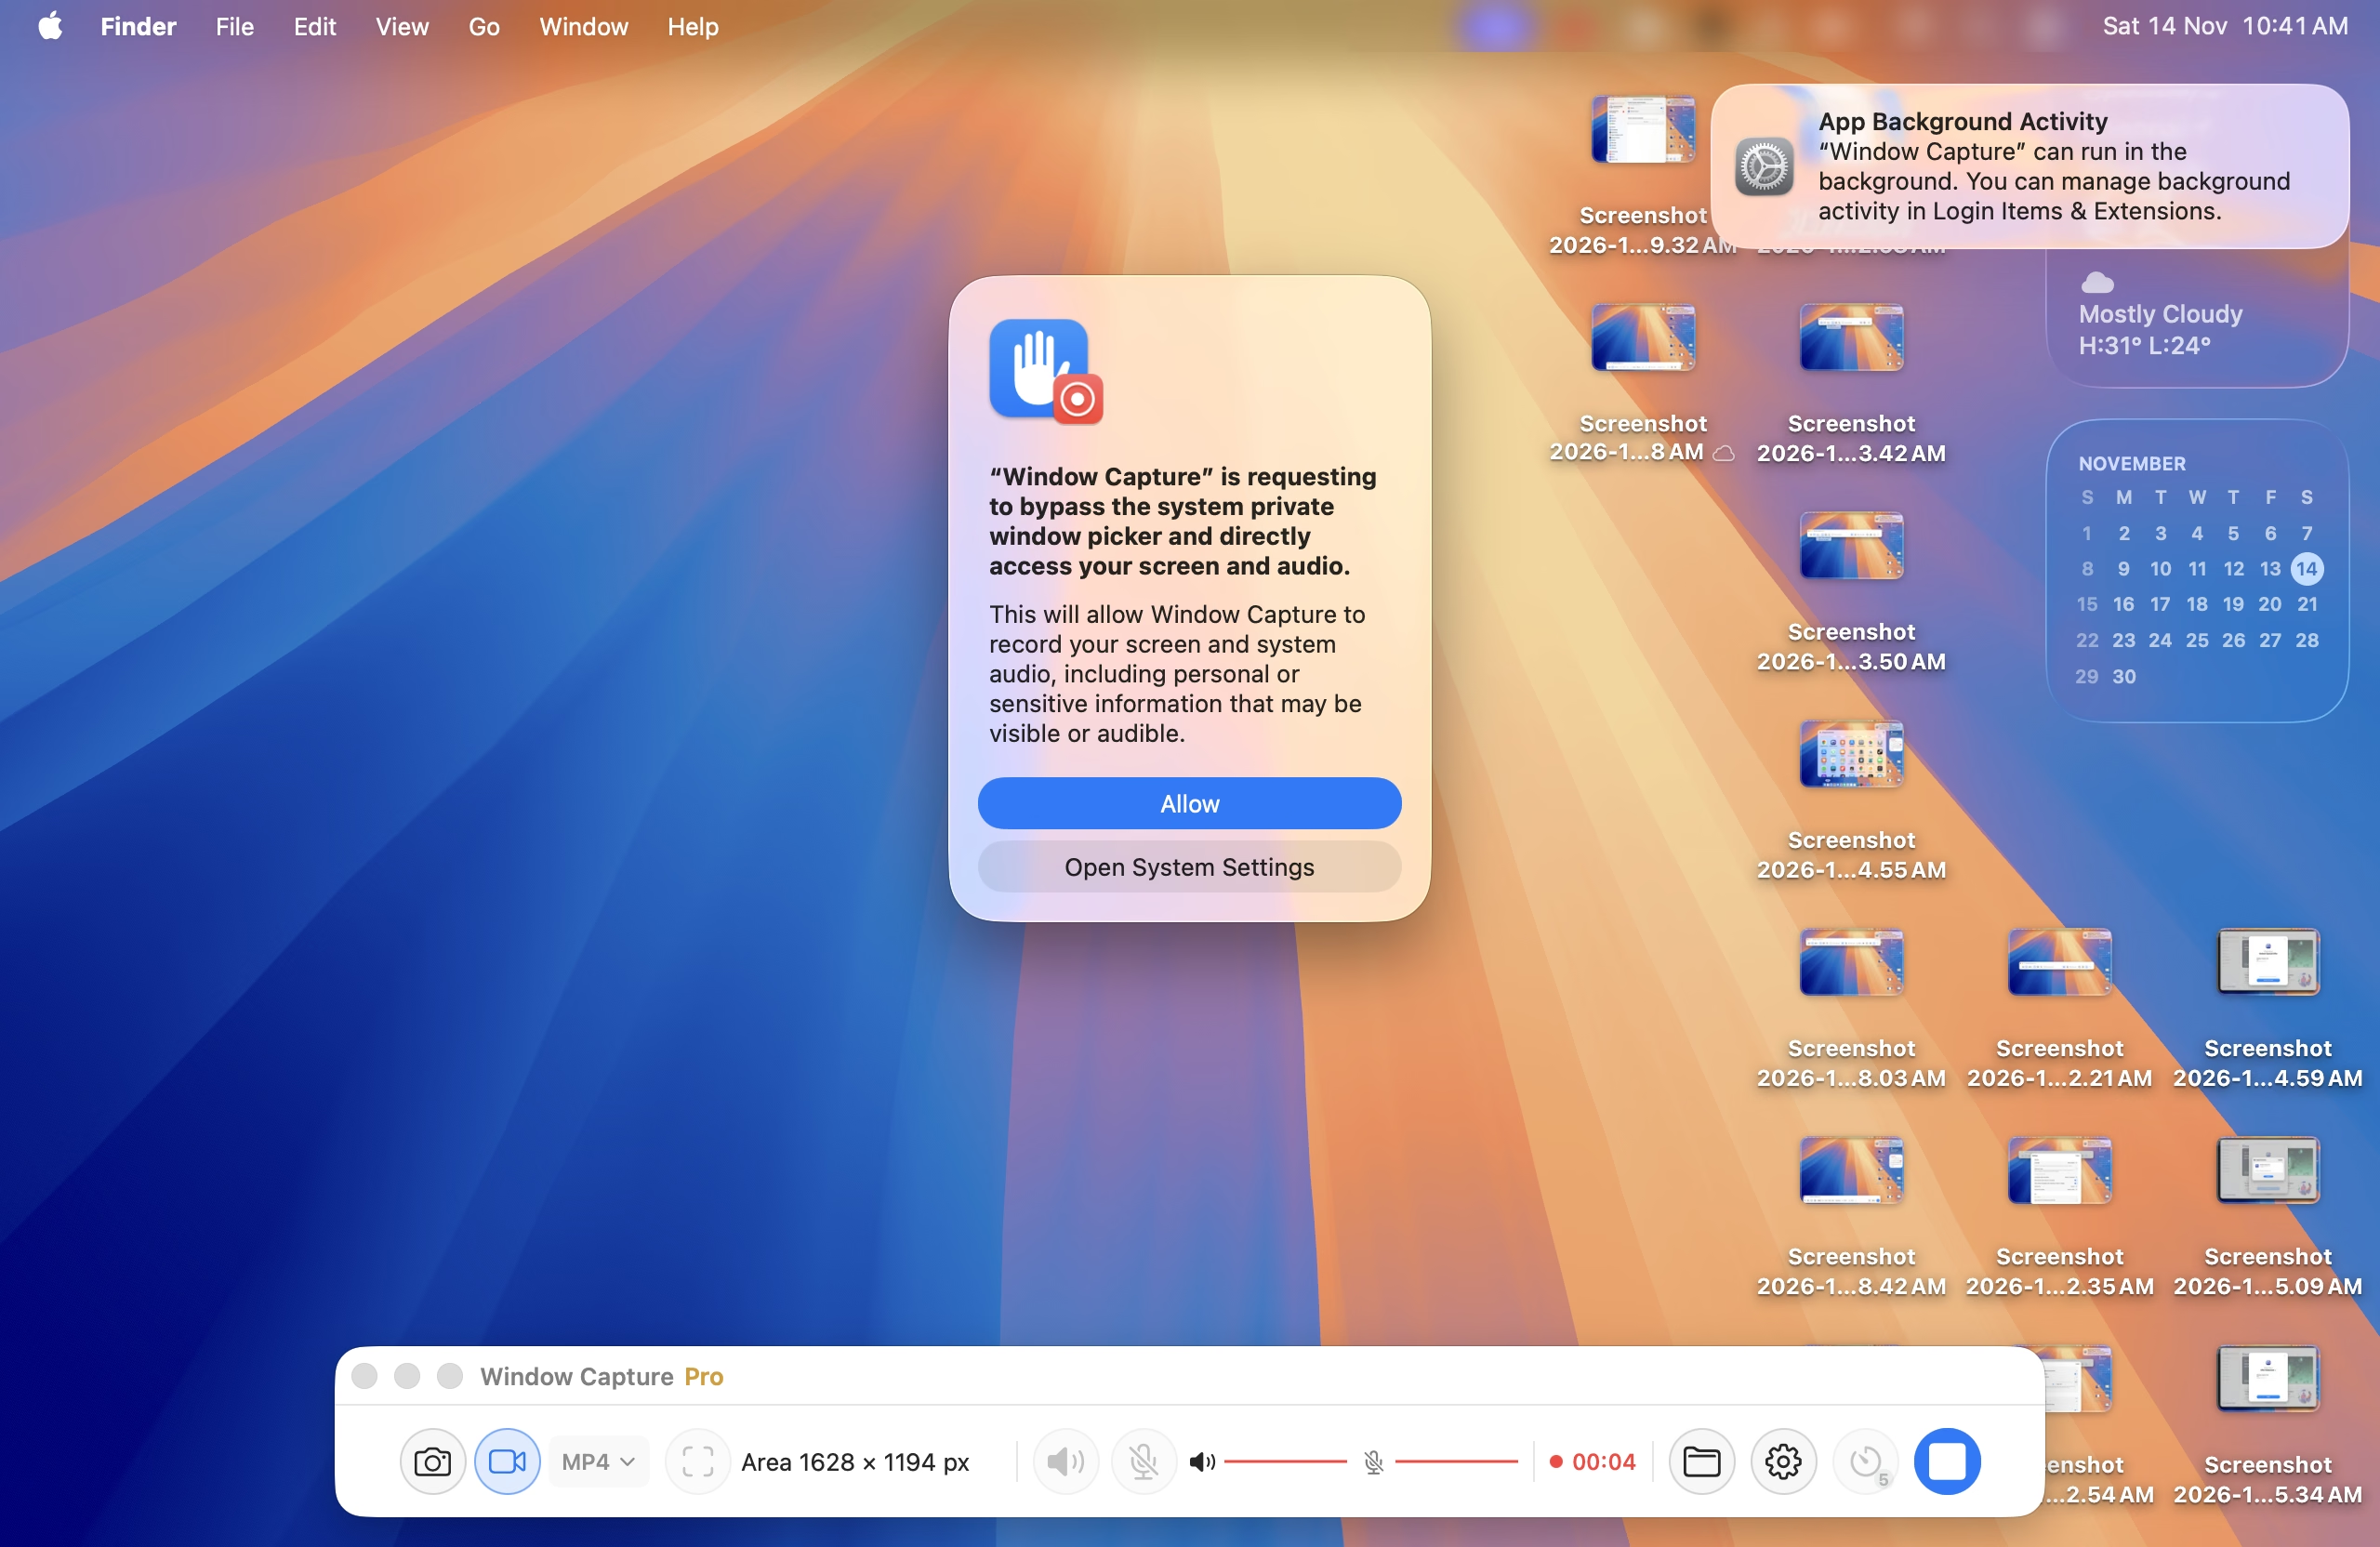
You’ll also see an “App Background Activity” notification. That’s because the setting “Use shortcut while app is closed” is on by default, so a small helper waits for the shortcut. You can turn it off in the app’s Settings or under System Settings → General → Login Items & Extensions.
Our hands-on test results
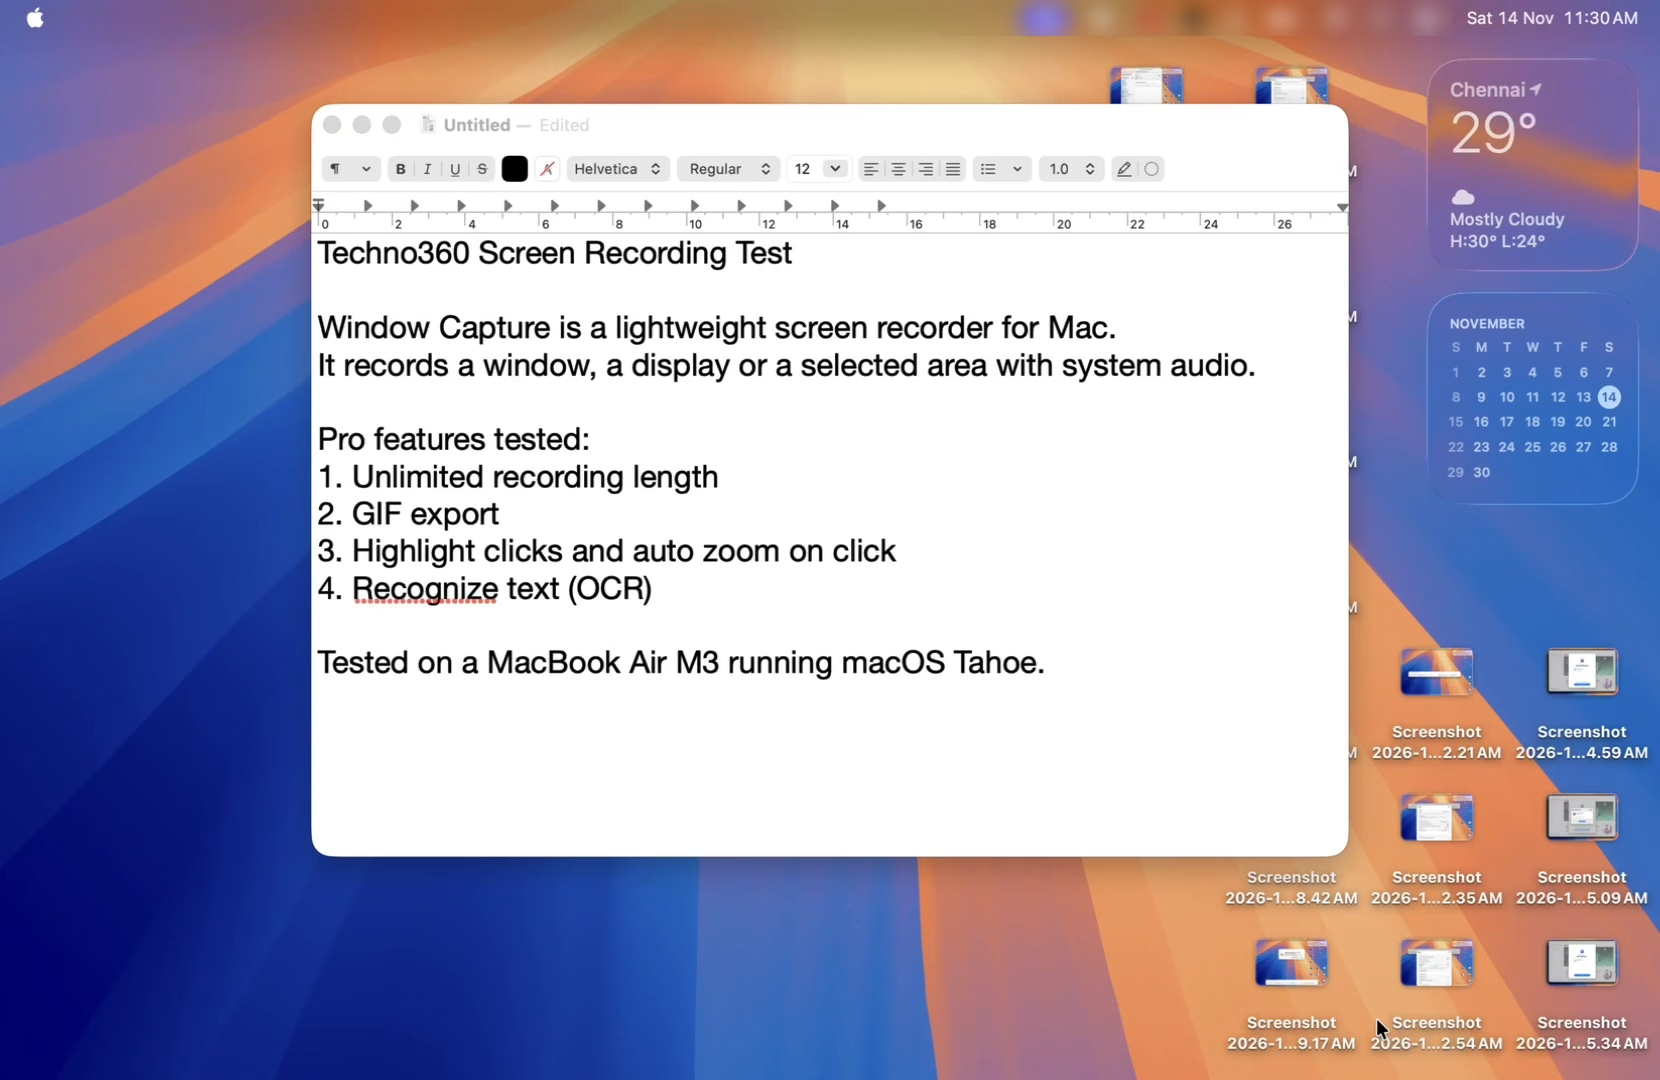
We didn’t just click around. We recorded real test files on our MacBook Air M3 and checked each one with FFmpeg for duration, resolution, frame rate and audio levels. These results describe our test setup; your numbers may differ with other displays, capture areas or microphones.
| Test | Result |
|---|---|
| System audio | ✅ Speech played through macOS was captured clearly, peaking at −2.2 dB, with no drift over a 63-second clip. |
| Microphone | ⚠️ Works, but the built-in mic was quiet: speech peaked at about −20 dB and mostly sat between −35 and −45 dB. The mic is recorded in mono and copied to both stereo channels. |
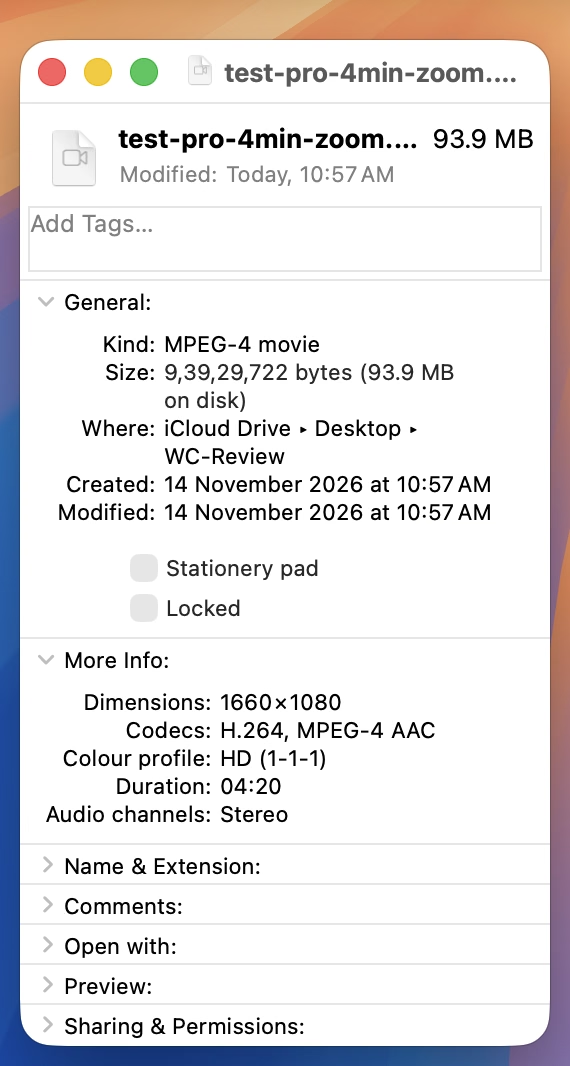
| No time limit (Pro) | ✅ We recorded 4 minutes 20 seconds without a stop. macOS Get Info confirms the file: 04:20, 1660 × 1080, H.264 + AAC stereo, 93.9 MB. |
| Video quality | MP4 (H.264), 60 fps, AAC 48 kHz stereo. In our full-display test, the 2560 × 1664 Retina screen came out at 1660 × 1080, so this recording was scaled to 1080p height rather than kept at the display’s native resolution. |
| Auto-zoom on click (Pro) | ✅ Smoothly zoomed into each click and back out. Saving took a few extra seconds, as the app warns. |
| GIF (Pro) | ✅ 960 × 624, 10 fps, 1.3 MB for 5.4 seconds of full-screen capture. No audio, as labelled. |
| Recognize text (Pro) | ⚠️ Accurate on clean text, but it mixed lines from side-by-side columns and read menu-bar icons as junk characters. |
| Capture bar in recordings | ✅ The bar itself never appeared in our videos, even in full-display mode. |
What the audio results mean for narrated tutorials
System audio came through at a healthy level, peaking at −2.2 dB, while the MacBook’s built-in microphone was much quieter, peaking at about −20 dB. Window Capture mixes both sources into a single audio track, so you can’t raise your voice separately from the system sound in a video editor afterwards. If you record voiceovers, sit closer to the mic or use an external one, and test a short clip before a long session.
Free vs Pro
| Feature | Free | Pro (₹799 one-time) |
|---|---|---|
| Window, display and area capture | Yes | Yes |
| MP4 with system audio and mic | Yes | Yes |
| Recording length | Up to 3 minutes | Unlimited |
| Trim start and end | Yes | Yes |
| PNG screenshots | Yes | Yes |
| GIF recording and export | No | Yes |
| Click highlights and auto-zoom | No | Yes |
| Show or hide cursor | No | Yes |
| Recognize text (OCR) | No | Yes |
| Auto-copy saved file to clipboard | No | Yes |
Privacy
Here’s what each privacy claim rests on:
- “Data Not Collected”: this is the App Store privacy label, a developer declaration that Apple hasn’t verified.
- Captures stay on your Mac: the app’s About section says captures are saved on the Mac and screen and audio data aren’t sent elsewhere. Our recordings were saved locally, as described.
- OCR runs on the device: this is the developer’s statement on the App Store listing. We didn’t test it independently.
- No cloud upload: we found no sign-in, account or cloud upload feature anywhere in the app during testing.
One thing to know: by default, recordings are kept in the app’s own folder inside your Library (~/Library/Containers/com.macwindowcapture.app/…/Captures), not in Desktop or Movies. Use the folder button on the capture bar to choose a more convenient location, or use Save Video from the preview.
Pros and cons
| 👍 Pros | 👎 Cons |
|---|---|
| Tiny 1.9 MB app with a clean capture bar | Our full-screen Retina test was scaled down to 1080p height |
| Reliable system audio capture with live meters | Mic and system audio share one track, so you can’t balance them later |
| Auto-zoom on click is great for tutorials | Built-in mic recordings come out quiet |
| Social-friendly aspect ratios (9:16, 4:5, 1:1) | OCR mixes lines from multi-column layouts |
| One-time Pro price, no subscription | Default save folder is hidden in the app’s Library folder |
| Says captures stay on your Mac | Apple silicon and macOS 15+ only; no webcam overlay or annotation tools |
How to record your Mac screen with Window Capture
- Install Window Capture from the Mac App Store and open it.
- Click the video camera button for video, or the camera button for a screenshot.
- Choose Window, Display or Area, then select your target. The record button becomes active.
- Turn system audio and the microphone on or off as needed.
- Press the record button or Command + R. After the countdown, recording starts.
- Press Command + R again to stop, then trim, export as GIF or click Save Video in the preview.
Who should use Window Capture?
- Mac users who make software tutorials or app demos
- Bloggers and YouTubers who need quick clips with system audio
- Developers and testers recording bug reports
- Anyone who wants fast GIFs of an app or website
- People who prefer a one-time purchase over a subscription
Who should skip it?
- Anyone who needs native Retina or 4K output (our full-display test was scaled to 1080p)
- Creators who need separate mic and system-audio tracks for editing
- Video makers who want a built-in editor, annotations or a webcam overlay
- Owners of Intel Macs, or Macs running macOS 14 or older
Get Window Capture on the Mac App Store
📊 Techno360 Verdict: 4/5
Window Capture does the basics very well. It records clean MP4s with system audio, stays out of your recordings, and doesn’t bury you in settings. The free version is good enough for short clips under 3 minutes. For ₹799, Pro adds unlimited length, GIFs and an auto-zoom-on-click effect that makes tutorials easier to follow. It’s a one-time price with no subscription.
It isn’t a full replacement for tools with editing, webcam overlays or 4K output. If you need separate audio tracks or full Retina resolution, look elsewhere. But for quick, lightweight recordings on an Apple silicon Mac, it’s an easy recommendation.
FAQ
Is Window Capture free?
Yes. The free version records MP4 video with system audio and mic for up to 3 minutes per clip and takes PNG screenshots. Pro is an optional one-time purchase (₹799 in India, $7.99 in the US).
Does Window Capture record internal (system) audio?
Yes. In our test, audio played by macOS was captured clearly without any extra audio driver. You can record system audio, your microphone, or both.
Does it work on Intel Macs?
No. Window Capture needs an Apple M1 chip or later and macOS 15 Sequoia or newer.
Where are recordings saved?
By default, in the app’s own folder inside your Library. Click the folder button on the capture bar to pick a different save location, or use Save Video in the preview to save each clip where you want it.
Can it record in 4K?
Not in our testing. Recording our 2560 × 1664 display produced a 1660 × 1080 video at 60 fps, so output is scaled to 1080p height.
Disclosure: The developer provided Techno360 with a free Window Capture Pro license for testing. This is not a paid placement, and the developer had no input into this review.
Discover more from Techno360
Subscribe to get the latest posts sent to your email.
